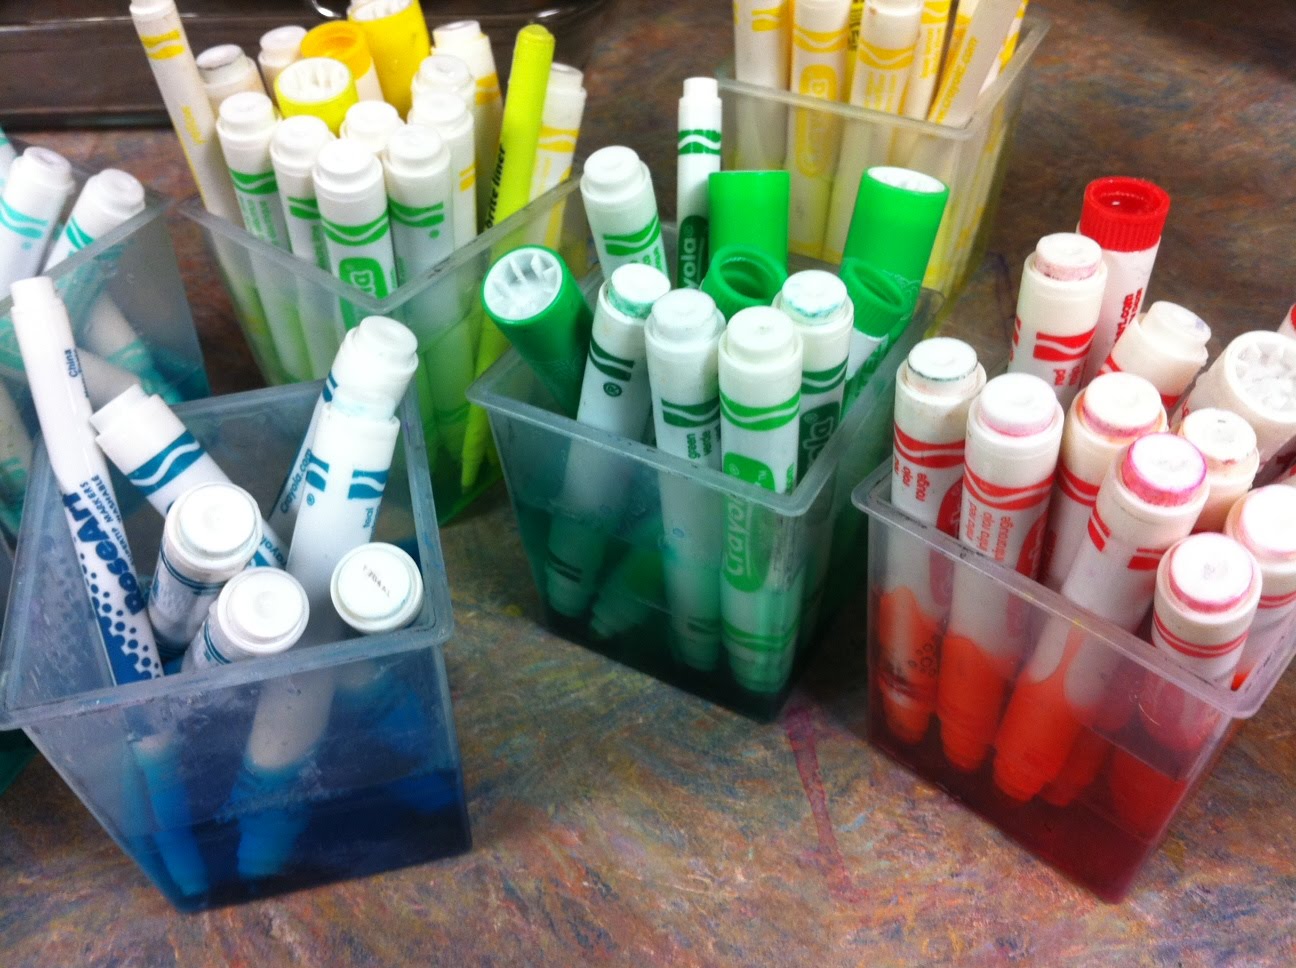

Don't you love free stuff? Of course you do! It's part of your teacher chromosome! ;) I thought I would share this technique because it is essentially free, and it's working so well for me. I heard about this from Debi West, a fabulous superwoman art teacher from Georgia. She suggested making liquid watercolors from "dried out" markers. All you have to do is take the lids off the markers and soak the tips in water. It took me a bit of experimenting to perfect the ratio of ink to water. I found that it worked best filling these square cups to the line and then putting in as many markers of one color as I could. The watercolor paint can be diluted more if you want a pastel look, but I prefer the color be as bright as possible. I then pour the colors into seperate larger bottles for storage. (****UPDATE: If you have a pair of pliers, you can actually take the marker apart and remove the foamy ink reservoir, then put just THAT into the water. That works even better, I've found!****)
 When I let the kids paint, I fill squeeze bottles (the kind with the twisty lids that are made to hold glue work best)with the liquid and they can refill their palettes themselves. The students always ask me how I make the paint and they are amazed about the markers. I've also found that the other teachers at my school are happy to give me boxes of used up markers that they haven't thrown away. I guess holding on to supplies so they can be recycled is another part of the teacher personality. Once or twice a year I'll email everyone and say, "You know that tub of markers that barely work that has been taking up space in your cabinets? I'll be glad to take it off your hands!" I always get pounds and pounds of them.
One thing to be aware of is that the paint in the bigger bottles can get a little smelly every once in a while, just like tempera paint. I usually fix that problem by squirting a significant amount of Germ-x into the paint, and shaking it up. Maybe that isn't the best way but it works for me. In my opinion, this is a minor problem considering that this stuff is free, easy to obtain, and the resulting paintings are beautiful. The projects you could do with liquid watercolors are infinite.
You've got some great posts! I have awarded you a Versatile Blogger Award. (You can click on my latest post for details.) ttp://thecleverfeather.blogspot.com
ReplyDeleteGREAT IDEA!!
ReplyDeleteLOVE this!! I just shared a link to your post with my facebook fans. Am going to start saving those dried out markers!! I wish I had known about this while I was still in the classroom. Thanks so much for sharing.
ReplyDelete-pink and green mama,
MaryLea
Great idea!!! Know what else? The tops off those markers make really great additions to the block area! My kids love to stack them up, make rainbows on top of the arched blocks, and they also use them as finger puppets! : )
ReplyDeleteWhat a great idea!
ReplyDeleteI agree about saving the tops, too. Besides using them in the block area, they are great for sequencing, patterning, and matching games, board game pieces, and collage materials. You can also make colored glue from the old markers. Pop off the bottom, pull out the inside column and put it in a bottle of white glue. It takes a couple of days, sometimes a week, to color the glue, but it's fun to do at school and let the kids watch the color seep into the glue.
ReplyDeleteI posted about this last year, WE have a lot of great things to do with the markers that don't work. It actually works better if you take the markers apart and sink the center of the marker in the water. I also let mine sit indefinitely in the water... http://childcentralstation.blogspot.com/2010/08/markers-dont-work.html
ReplyDeleteBrilliant! My kids will love this!
ReplyDeleteI bet that if you used distilled water, it would solve the smelly problem.
ReplyDeleteso how much water do you add? you mentioned you fill it to the line...
ReplyDeletechelsea
artstork.blogspot.com
I use old scraps of crepe paper and soak them in water. Probably works the same.
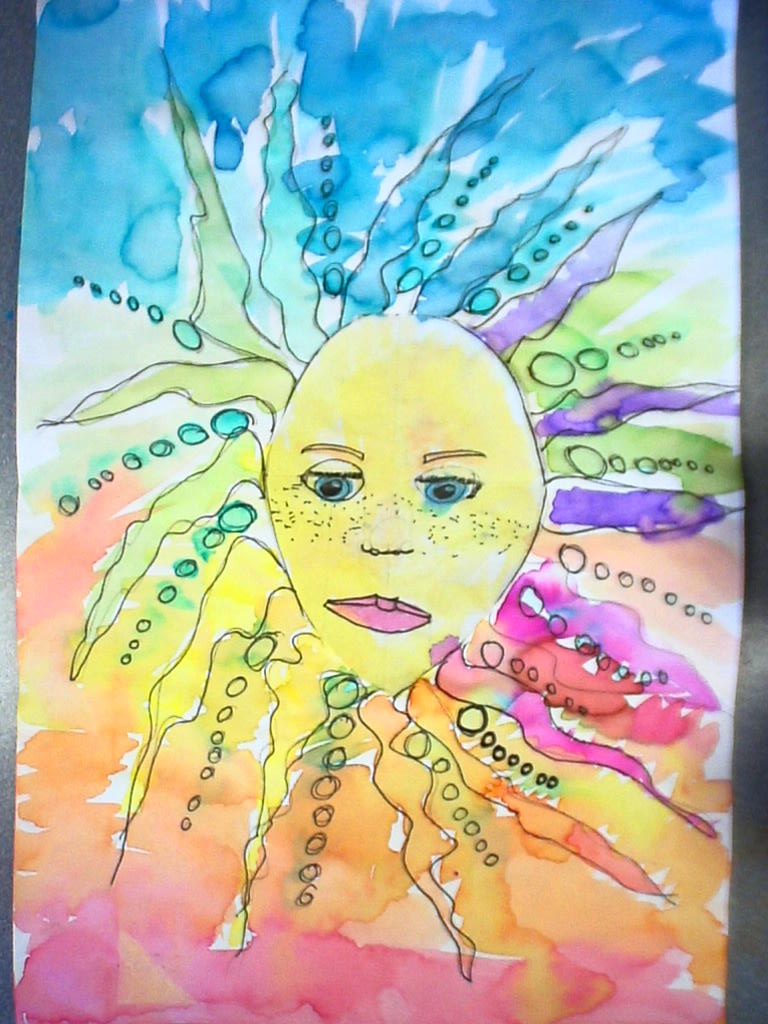
ReplyDeleteThe above masks were created by 3rd-5th graders.
My 3rd-5th graders looked at the masks of artists Kimmy Cantrell and Eric "Straw" (Strawczynski). They come from completely different walks of life, yet have distinct parallels. Cantrell is an African American artist from Atlanta Georgia. Once a purchasing manager for Target, he decided on the heels of job change and divorce to reconnect with his love of clay. Vases evolved into bowls and bowls into his current niche, faces. Now as a full time artist, Cantrell creates clay masks with both tribal and Cubist influences. They have wonderful bold graphic shapes, interesting textures and eye popping candied glazes. I knew instantly my students would enjoy his primitive and edgy take on the human face. Minus a kiln, I decided to do a recycled cardboard approach to these masks. Literally a day before my class, I came across the fabulous work of Eric Straw from St. Martha Catholic School Artists (this is why I so love the give and take of art teacher blogging). What amazing luck to find an artist whose masks have both tribal and sometimes Cubist roots, bold features.....and that uses cardboard and only cardboard! Straw, (as his friends call him) who worked as a professor and researcher in social sciences, turned to antique toys to escape this left brained world. He not only became an expert in that genre but began creating his own marionettes, busts and masks. His work contains bold imagery as Cantrell's, combined with a lot of humor. This humor would go far with my spirited and lively group of 8 to 10 year olds.
Today my students mapped out their face shape on cardboard and got to work on creating their unique facial features. Some did this directly on their cardboard. Others used remnants of cereal and cracker boxes and cut out their facial features. Paint and oil pastels were offered to add color to their masks. I took Kimmel's use of large nails on some of his masks a bit further. I offered keys, nuts, bolts, pennies, soda can tops, hooks and even fettucini noodles (the hair on the 2nd mask) and quite a few more items to echo the humor of Straw's pieces. Many of these items slip easily between the corrugated cardboard. My kids are off to a great start. I will have some wonderful unique masks to post next week.
Posted by Mary at 8:03 PM 6 comments Links to this
Hi :-) I am an art teacher as well and I just ran across your awesome blog. Two tips to pass on - You can also make colored glue by putting the ink reservoir into a bottle of glue. Also, you didn't mention the type of palettes you used, I made palettes for the liquid watercolors by sinking 3oz plastic cups into a pie pan with plaster of paris. Double-up the cups so that you can remove the paint one color at a time. Students can also blot their brush on the plaster to save on paper towels. While it was a bit of a time/material investment up front, they worked great and lasted at least 4 years (I have since switched grade levels, so I am not sure if the current teacher still uses them).
ReplyDeleteHi
ReplyDeleteTwo other marker tips.
(1) Open the back of the pens and add a few drops of water. They can be used again for a while.
(2) Open the back of the pens and add a few drops of ordinary household bleach. Use a waterwash to pre-colour paper and then encourage children to draw on this with the "bleach pens". Where they draw the colour disappears. (same idea as drawing with bleach dipped in Q-tips).
Joan
Whaaat? That is so cool! I'll have to try that! :)
DeleteGreat tip! I will be saving my markers from now on. Thanks for sharing.
ReplyDeletei tried this today and did something a lil diffrent....an empty cup take apart marker take out the color sponge piece slowly run water through the tip(this gives you pure color that it trapped in the tip)..then once its white take and put the spongy piece it it and if you want put on rubber gloves and squeeze the spongy tube also helps clean it out!!! and i only needed one marker and my color was strong!!!
ReplyDeleteartist trick for alcohol ink: soak your markers as you say. Put into spray bottles. fill up with isopropyl alcohol. Voila. Spray inks! When dry, the inks can be re-activated with a light spritz of water. You can seal with hairspray.
ReplyDeleteInstead of using GermX maybe using GSE (grapefruit seed extract) to use as an alternative natural preservative. Just a couple of drops should do.
ReplyDeleteYour blog has given me that thing which I never expect to get from all over the websites. Nice post guys!
ReplyDeleteregards,
airless spray