Tuesday, December 13, 2011

Celtic Knot Unit

Today I was again shocked at how well my kiddos were concentrating as we drew Celtic Knots.  This must be one of those magic left brain drawings that lights up the whole kid's mind.  :)  Here are the steps for drawing another Celtic Knot unit.  Yes.  MY FOURTH GRADERS CAN DO THIS!!


Monday, December 12, 2011

NEWS FLASH! Acrylic Paint +Crayola Glue = Block Printing Ink

I have been frustrated with the cost of block printing ink, and the way that it seems to get wasted whenever I use it with my students.  So I tried making my own.  I was shocked that it actually worked.  :)

Using CRAYOLA school glue (not the runny Elmer's kind) and regular old cheap-y acrylic paint, I mixed an almost 1:1 ratio.  I put a little bit more paint than glue.  Then I used the roller to mix it all.  I suppose you could do this ahead of time and keep it in air-tight jars.  maybe the glue would settle to the bottom of the jar though.  I don't know.  Anyhow, the thickness of the glue made the paint less runny, and it also added a bit of tackyness to the ink, so that it had that orange peel texture as I rolled it on the plate.  Only problem I noticed was that it dries faster than block printing ink.  Maybe that's not a problem to you, but I'm very fastidious about my prints, and I clean as I go, so I work slowly. 

Anyhow, it worked!  I thought this was worth sharing with all 88 of you ;)

Celtic Knots and Radial Balance

I wanted to spice up my Celtic Knot project that I've done several years in a row, because so far it just hasn't met my expectations.  Previously, I'd had the kiddos use their initials to make illuminated letters with Celtic imagery (which I'd photocopied from my Dover books and passed out in resource folders).  Most students just didn't really puzzle out how to draw the overlapping knots.  So I thought I'd make it easier by having them draw the knots with a Zentangle pattern.  Here are the steps for the pattern:


Original link here:  Tangle Patterns


So I showed them that step-by-step on the Elmo.  I expected a train wreck.  I told them this was an experiment, and I was going to see how they did before we even worried about turning this into a project or anything.  I expected tears, and crumpled papers flying across the room, hitting me in the head.  But, y'all....They did it!  They got the pattern in one or two tries.  Even the more challenged kids picked it up and were very satisfied to see that it worked for them!

Then I started showing them my work in progress.  I told them I was going to have them draw 1/4 of a Celtic knot, and "cheat" to make the pattern transfer onto the other parts of the paper.  I haven't tried this with the kiddos yet, so I'll keep you updated on how that goes.  This would work even better if you are willing to let the kiddos use charcoal pencils to outline their knots as they are transferring.

But here's what I did for my example:

 Fold the square paper in fourths and draw design in one corner.  Trace over it hard with an ebony pencil or other soft lead pencil.


 Fold and press with your hands, or a wooden spoon to transfer the pencil lines onto the second quarter of the paper.


 Open and you should see a very faint reverse image of the knot you drew.  Trace over it dark with the soft pencil. 


 Fold and transder the first half onto the second half.  (Good way to review factions, too!)


 Trace over the pencil lines darker. 


Connect the lines where they may be slightly mismatched, and begin coloring however you wish.

I think I'll make another fancier one as I go along, but I think the above example works well as an illustration.  Our state's standardized test has evidently got symmetry on it, and the kids aren't scoring so well with that.  In that case, I can actually help!  I've been stressing symmetry with all the grade levels this year.

Thursday, December 8, 2011

Finished Thiebaud Cupcakes

These turned out really cute!
The finished project


Shaving cream "paint" still wet

I ended up just mixing the "frosting" paint in a ziploc bag, about 2 bottles of Elmer's glue to half a can of shaving cream.  I cut the corner of the baggie off and squeezed the frosting on the cupcakes myself.  The Kindergarteners were not able to use the small squeeze bottles efficiently, and ended up with not enough frosting, or way too much.  Thus, I let them add more details, like the crinkles on the cupcake wrappers and the sprinkles and cherry. 

The frosting paint took TWO FULL DAYS to dry.  Beware of taking them off the drying rack and storing them when the frosting is dry-ish, even dry to the touch, it can still squish out from underneath and get them hopelessly stuck together.

UPDATE:  I've since made this project even better by mixing in one more element:  JELLO.  See my blog on Chocolate Paint.  After I tried it that way, I noticed the paint drying very hard, but it still had texture.  I wanted the texture to be fluffy though!  So I mixed about a half a box of JELLO pudding powder into a half a gallon ziploc baggie with a fourth a can of shaving cream and a half a bottle of glue.  I made two batches; one chocolate and one vanilla.  Below are the results of this experiment:

See how fluffy they are!  They have to be staggered on the drying rack, because they even rise a little bit as they dry.  Some students decided to make ice cream cones instead of cupcakes.  I like that idea, too. 

The finished product!  If you look closely you can see a little indentation on the left side where the drying rack smushed the icing a bit as it dried.
 
So far I like the Jello/Shaving cream/glue paint the best.  But for different applications, I can see how the other types could be very useful too!

Friday, November 11, 2011

Wayne Thiebaud Inspired Cupcakes with Texture! (And the Joy of Pinterest)

This is my new favorite Kindergarten lesson.  I might even try it with Second grade just to see how far I can push it.  First, I talk about texture and show the kiddos a short video clip.  Then I set up "centers" in the room for the different textures.  At one table, I set up tissue paper and watered down glue, and let the kids cover a half sheet of drawing paper with the crinkly textured paper.  For this example, I just used straight water, and pulled off the tissue when it all dried.  The dye left the inpression of texture, just visual texture, not tactile.  But for the kids I put a little bit of glue in the water, and so far they are doing just fine with this technique.

At another table, I set up my "epic sparkle paint" or "lumpy paint" as I called it in one class.  I just literally poured all the remnants of various specialty paints I had into a cool whip container and mixed it all up.  I had mostly gold tempera, with various colors of glitter glue and loose glitter, and some "texture-it" paint.


The kids painted another half sheet of drawing paper with the gold sparkle paint.  I ALMOST let them use their hands for this, but with 28 kindergarteners in a class at a time, I couldn't deal with it all.  if you have a smaller class, or you want to do each step one day at a time, then it might work to let them use their hands.  I've done that with first grade before, and it was a lovely mess.  :)

At the third table I set up texture rubbing plates, crayons without paper, and free draw scrap paper.  This was a great filler activity, because it related to what we were making, but they could take it with them, instead of having to let it dry. 

On day two, after talking about the fabulous Wayne Thiebaud and his deliciously textured paintings, the kiddos will be given trapezoid-shaped stencils to trace onto their gold paper and cut out.  Those will be glued onto the tissue paper background with glue sticks. 

Finally, the PUFFY PAINT!!  This was so easy I almost choked with joy.  :)  In a ziploc bag, I squirt equal parts Elmer's glue and cheap Shaving cream.  I smush it all up.  Thenm I empty the air out of the bag and reseal it.  I cut the corner of the bag off and squeezed it out just like icing!  You may have to make a fresh batch for each class, so don't make too much at once!  I am trying to get some red pom poms or buttons to add to the top of our cupcakes as little cherries.  I've also seen people use colored rice for sprinkles. 

I like this puffy paint better than other texture paints, which I've made with sawdust and joint compound in the past.  This was just so fun to squeeze and it even smells nice!

I am a little worried I might have some kiddos try to eat their cupcakes.  Haha!  And you know what, while this project is ever so slightly cutesy, I like that it can be so closely tied to the Element of Texture and the artist Thiebaud.  It's almost over the top for me, but the puffy paint made it way fun.  Above is my Gigi's style cupcake, with 90% icing.  :)

I am going to experiment with another texture paint recipe I found on Pinterest.  This one uses flour, salt, and tempera paint.  They put it in condiment bottles, and that may be easier to mix up than the shaving cream. 

By the way, if you are an Art Educator, a teacher, or a parent, you MUST check out Pinterest.  It's a bulletin board system for pictures and links.  I can't say enough wonderful things about it.  Since I made my boards I have tried countless recipes, activities, and even put together outfits, and teaching ideas just because of other people's brilliance.  Lost of hits for my blog there too!  Here's a link to my pinterest page, feel free to follow me!

My Pinterest

Saturday, October 29, 2011

Artome: Best Fundraiser EVER.

This year, per suggestion by my principal, I tried a different art fundraiser.  In the past I've used OriginalWorks, and wasn't at all happy with it.  It was so much work for me to trim the pieces (they all had to be 8 x 10.5 or somesuch, a non-standard size) because invariably I'd run out of the paper they sent, or need to use a different piece of paper for the project, or I'd want to do a square or circle project that didn't fit the format...  It was also a pain to collect orders myself and handle all of the logistics.

Artome was infinitely better, because it turned the fundraiser into an event.  The kids were able to attend an art show in the evening with their parents, and see every child's work displayed in a beautiful frame with a double mat.  The company charges $18 per frame, and I elected to charge $25 on my end so that we made a pretty significant amount from each sale.  (More than yearbook!)  Parents are able to order the framed work, and even reproductions of the pieces for gifts, even if they cannot attend the show.

The best part of all was that Artome came to my school and set the whole thing up, took it apart, and handled the reproduction orders, and last minute frame jobs onsite.  I had many parents telling me they loved this idea, and that they definitely wanted me to do it again next year.

For once, everybody is happy!

Tuesday, October 11, 2011

Yoshimi Battle, Warhol Portraits, Oaxaca Animals, Keith Haring

Alright, the kiddos are finishing things now, and I am so excited about how this first round of big projects are turning out!  I had a deadline for my upcoming fundraiser, and the work all has to be finished by Wednesday of next week...this fundraiser is a blog entry in itself...more later.

5th Grade:
Yoshimi has battled the Pink Robots and her "ninja skillz" have paid off!  Objectives for this project included demonstrating knowledge of various types of balance, experimenting with lettering, figure proportions, and interpreting inspiration in a unique way.  Here are some of the finished works:


4th Grade:  I can't post a photo of the examples from the Warhol project here, since they include actual photos of the students.  But I'll do my best to describe what they did.  I took a photo of each kid standing in front of a white background.   Then I uploaded the pictures and bumped up the contrast and converted them all to black and white.  This project was all about CONTRAST!  I printed the photos out, two of the same picture on each page, and gave them to the kids.  They chose complementary colors from my treasure trove of Mr. Sketch markers.  (I recently acquired the 18 color packs which have tints of many of the colors.!  :D ) 

 They colored over their pictures, one in each complementary color.  Then they cut out their faces and bodies from the background, and glued them to another paper, which was already colored in the same complementary pair.  Finally, using darker values of the same two colors, they added Pop Art style lettering, and Ben Day Dots to the backgrounds.  So this was really more of a Lichtenstein/Warhol inspiration than just Warhol alone.  Anyhow they turned out pretty neat, and for a quick marker project, I was happy!  Lesson objectives included: analyzing color and contrast by choosing complements, and identifying and organizing colors by value. I figure you could also do this in primary colors, and teach a little about color mixing and Value...

3rd Grade:  Inspired by the Oaxaca Folk Art carvings of animals, we set out to compare organic and geometric shapes, and create patterns using shapes.    I had the kids find an image of an animal they liked, and draw it large on a white piece of paper.  Then, using thin-tipped markers (Mr. Sketch, of course!) they created patterns using EITHER organic OR geometric shapes.  I made sure I had them choose only one or the other, and stick to that theme, so that I could tell they could compare the shapes.  For this project I deliberately asked them not to draw any kind of background.  I think they are much more interesting without a fake "habitat" for the animals.


I've been impressed with this grade level so far.  I have one student who is so dedicated to finishing this project that she has come in EVERY DAY during recess the past week or so to work on it.  And we are having gorgeous weather.  I'm not talking about rainy days here.  This is the same group of kids I did Chihuly with last year, and they are just a super-creative group, with very sweet personalities and a lot of good character. 

2nd Grade:  The Keith Haring-Inspired line designs with movement are beautiful as I knew they would be.  Kids love Sharpies.  Heck, I LOVE SHARPIES.  When I told the kids we were going to have a fundraiser their response was, "So we can buy MORE SHARPIES!!?!?!?"  Yeah, baby.  So I posted the lesson for this Last Year, in September.  But this year I pushed the movement aspect of it more, and the kids seemed to understand the amount of lines I was asking for.   Objectives included: Creating pattern and movement using line, and being able to talk about Keith Haring.


Wednesday, October 5, 2011

Monochromatic Collages

 So this is a project from ages ago, but I was recently organizing my iPhoto, and it appeared.  I was very happy with the way they look displayed.  Ah the good old days when I actually had time to hang up artwork in the halls!  Ha! 
I showed slides of Mark Rothko (not one of my favorite artists, but the kids really responded well to the idea of color invoking mood.)  After a lesson on value, tints, shades, and all that, the kids chose one piece of construction paper.  This would be their HUE.  

Then they simply cut things from magazines that were in different values of that same hue.  Finally I had them cut letters out (ransom note style) and add them to their collage, making a sentence that pertained somehow to the mood of their artwork.  These turned out even better the next year when I ran out of construction paper, and instead gave the kids a half sheet of regular drawing paper and instructed them to color it entirely one hue, using the MR. SKETCH scented markers.  This not only made the kids ecstatic, but it also filled my classroom with a lovely fruity aroma.  I am a believer in aromatherapy, just as a side note.  And it may sound hokey but I really think scent has an effect on mood as well.  This was something I didn't think to point out to the kiddos at the time, but it would tie in well with Rothko.

After they all finished gluing, I had them coat their collages with watered-down elmer's glue.  The year that we started with white drawing paper and markers, the final glue coat liquified the marker a little bit, resulting in an all over subtle color wash.  Neither I nor the kids were expecting this, and they were overjoyed.  They were tinting their collages themselves.  What a nice surprise!  This also made the work feel more handmade, as the construction paper backgrounds tended to look a little flat.  


Monday, October 3, 2011

Assessment Rubrics

Yes, assessment.  How do we assess students in the elementary art room?  I give conduct grades, and most of the time it's a default S unless I have documentation that the kid has been particularly poorly behaved in class.  I have 790 kids.  They each do about 8 projects a year, so if I sit down and grade each one of them that totals 6320 grades per year.  Uh no.  Not doin' it.  My solution was to create a generic rubric for ALL projects, and then let the kids self-assess.  These assessments do NOT affect their conduct grades, but it is a good indication for me of who doesn't get the project objectives, and how they each feel about their work.  The first part of the rubric says "I CAN statements."  This is a district wide buzz word for "lesson objectives."  I have the lesson objectives posted on the board and I ask students to look at those and decide whether they honestly "CAN" do all those things.  For example, the statement might be "I CAN create patterns using lines."  If they have completed all the objectives, they get a 3 or in the case of the littles, they could get a :). 

BIG KID (Grades 3 and up) Assessment Rubric:


The kids are having their first experience with these self assessments this week, and so far it's going fairly well.  I have to talk it through with the littles, and probably I'll have to do that with the bigs as they finish up their project.  Since this is a new thing, I expect them to be a little weirded out at first.  But assessment was something I kept getting low marks for on my evaluations, so I've attempted to cover it this way, without making myself nuts trying to give individual grades.


LITTLE KID (K-2) Assessment Rubric:


After attending TN Arts Academy this summer and having a long conversation with an Arts educator about assessment in the Arts, I decided that it is very important, but it must be treated differently than assessment models for academic subjects.  After all, if you judge a fish on its ability to climb a tree, it will spend its whole life feeling like a failure.

I am having mixed feelings about the whole initiative to perhaps include the related arts on standardized tests eventually.  Yes, thank you, powers that be, for finally concluding that the Arts are important enough to be measured....but...please don't make me teach to a test...because I have a feeling that's what it'll come to.  We are already crunched for time and I am cramming as much material into my lessons as possible, but seeing the kids once a week (or less in some cases) for 45 minutes means that they have a hard time retaining much.

Anyway just a thought.  At least self-assessment is helpful feedback for me, and it holds the kid somewhat accountable.

Friday, September 30, 2011

Yoshimi Battles the Pink Robots

This year with 5th grade, I've tried what I consider to be a bold, outside-the-box project.  Prompted by a student's request that we do a project related to manga, and our Asian art theme, and the new Mr. Sketch markers, I thought about how I could tie all that together. 

Years ago when I was teaching K-8 at a small Catholic school, I tried this on the first day of my Art Appreciation class with the middle schoolers.  I turned on the Flaming Lips' Yoshimi Battles the Pink Robots, Parts 1 and 2 and asked them to sketch whatever images came to mind as they listened to the music.  They thought I was from another planet.  They were used to nuns and opera music in the art room.  Robots were unheard of.  But their images were interesting.  I think they were held back mostly by the fact that they were middle school kids, and thus more concerned with looking cool than with being creative. 

This year's 5th graders are diving into this project with uncanny enthusiasm.  Maybe it's because I told them a fellow student gave me this idea, or maybe it's the musical element, or the smelly markers.  The objectives for this lesson included drawing body proportions of the girl Yoshimi, face proportions, choosing a type of balance to use (i.e. radial or asymmetrical) and experimenting with comic style lettering.  So far they are enjoying it.  I'll have to post some examples when they finish.

At least for now, they are all singing, "Oh Yoshimi, they don't believe me, but you won't let those robots eat me..."

Tuesday, September 20, 2011

Marker Monster


I collect dried-out markers in my classroom and have turned them into lovely liquid watercolors.  But to prevent the kids getting frustrated by repeatedly trying more and more markers from the box and finding dried out ones, I have the students put the old, dried out markers in the "Marker Monster."  He holds the old markers in his belly until I am ready to make a new batch of watercolors. I just covered a copy paper box with black paper, cut a slit in the front, added the eyes and fur.

 I even let the Monster eat Sharpies, because they too can be revitalized using NAIL POLISH REMOVER.  Yes!  It works!  Just soak the tip in a little bit of the nail polish remover and recap the sharpie.  Overnight, the liquid refreshes the ink!

So far they are in love with the Marker Monster.  I love his crazy teeth, which are now splattered with various marker smudges.  It's a little macabre I suppose, but oh well.

Wednesday, March 30, 2011

Crane Count: 384

384 Cranes so far, and the kids are still so motivated! Today was a chilly, drizzly day and I had at least a dozen kids give up their recess time and come to my room to help crank out paper cranes. Some kids have made over 30 themselves. We sat in my classroom in near silence, everyone diligently working while one student counted today's haul. It was so cheerful the day after we started this so see kids randomly pop into my classroom with a handful of cranes he or she had made outside of class. Today I discovered that some of the kids actually got a head start on collecting donations for Japan. They went door to door in their neighborhood and gathered over $100 by themselves! I did not ask them to do that at all, they just went for it. WOW. The extraordinary character of these kids is so moving. I've had a couple of students who are proficient in crane-making teach the others who are struggling, and I've seen the struggling ones gradually become the proficient ones and begin to teach others too.

An Old Standby with a Twist


Georgia O'Keefe flowers. We all do them. But this is the best result I've had, so I thought I'd share. Second graders are very creative and unafraid of drawing yet, so I had them draw their flowers from looking at silk ones I put at each table. I explained carefully about not drawing what they imagine they should see, but instead drawing what they ACTUALLY see. We call those ideas of what something is supposed to look like "Schema." As in, previously learned information.


So the drawings themselves were very interesting. I required the kids to use asymmetrical balance, and go off all four sides of the paper, leaving as little negative space as possible. After drawing with pencil, they traced over it in Sharpie.


Next I had them use tissue paper and diluted white glue to color the flowers, brushing over the tissue like a decoupage. Lastly, after this was finished and dried, I had them add value shading and color accents with chalk pastels. (We got lucky and happen to have a box of Prismacolor Nupastels for each table - a donation.) For many students, most of what they did was trace the sharpie lines with black chalk pastel, and then blend it with a paper towel. I was thoroughly thrilled with how they turned out, and how well the kids listened and learned to use a new medium.


After everyone was finished, I lined them up outside and sprayed the artworks with Aqua Net hairspray as a fixative. They LOVED that. I have no idea why, but that seemed like the coolest thing in the world to them!


If any of you readers have a different way of doing this project that you just love, share it with me! I also wonder how 2nd graders are doing for you at your school. Is it me, or are they all super sweet this year?

Tuesday, March 29, 2011

Paper Crane Count: 331

So far the kids have made 331 origami cranes, on their way to 1000. I think I've figured out what we can do with them as well. We will have to take time outside of school to set up a little booth at a community event or location (like outside of Kroger) to collect donations to help Japan. We will give the money to the Red Cross, but will not use their name or logo.

Monday, March 28, 2011

Friday, March 25, 2011

Quick Zentangle Swap with COLOR

I just created another Zentangle swap on Swap-Bot. This time I specified that the tiles can include black, white, gray, and up to two colors. Come on and join in! Click Here.
Posted by Picasa

Friday, March 18, 2011

Grocery Bag Zentangle


For this, I used a square of paper I cut from a grocery bag. At first I wasn't really thinking much, then it occurred to me I actually had three values to play with. So I began using the brown as my middle value and making shadows and highlights with the black and white. Later attempts will be more refined, I suspect. I like doing this! The white pen is just awesome. It's a Pentel Sunburst MED Gel, by the way. I was tempted to get the gold and silver pens too, since a gold & silver in the same pack was the same price as one white pen. But I dunno, I am afraid of heading into the "scrapbooky" world. Scrapbooks are just not me AT ALL. No offense of any of you scrappers. I just never got into it.

Crane Count: 183


Yesterday during play practice I had a lot of students sitting and waiting to go on stage for their parts, so I handed them origami paper and told them to make paper cranes. Not only were they more quiet, but they made a huge bag of cranes! It brought our total up to 183. I had to fix about 20 out of the 70 or so they made yesterday, but that's not bad. I had one kid tell me his goal is to make 32 so that he will have contributed his 8 plus covered 3 more kids who weren't able to make theirs.

Thursday, March 17, 2011

Paper crane count is up to 107. More than 10% of our goal. :)

Crane count: 89

It's going slower than I thought. At least that gives me more time to figure out what to DO with them all! Apparently fundraising for the Red Cross has all sorts of regulations associated with it, so I'll probably have to make some calls.

Tuesday, March 15, 2011

Weekly Challenge #13: Non-Dominant Hand


Here's my Zentangle that I drew using my left, non-dominant hand. I kind of like the line quality. It looks nervous or something. I think, coming up, I'm going to try some on brown paper using my white pen along with my blacks.

Crane Count: 36

Day One has begun and we have 36 cranes. Most of them aren't too wrinkly. I am still working out how to display and distribute them. I know at least with 130 5th graders, each kid can make 8 and then we'll have 1040, enough to give one to all the school teachers and still have 1000. But that's just enough to make one wish. And they don't really need wishes over there right now. Prayers yes, but what else can we do? I doubt there is even any way to send mail. We will have to get connected with an organization like the Red Cross who can actually physically go there to help. Wheels turning. We'll see.

Monday, March 14, 2011

A Thousand Cranes


OK, I'm just gonna do it. I've been wanting to have a class make a thousand paper cranes since I first heard the story when I was a kid. And the time is just right now. I have a good group of 5th graders who are diligent enough to take on the task. I have 5th grade teachers who are in the middle of a unit on World War II, and on top of that, and probably most importantly, Japan has been on my mind and the minds of many of us lately.
I don't know how I'm going to tie this all together, but I already had a 5th grade teacher email me and say she would encorporate the Sadako story into her language arts lesson. So now, I HAVE to do it; she's planning around it too! :)
Two old friends of mine are currently living in Japan. They don't know each other and probably never will. But both of them have been sharing very different points of view about the tsunami and earthquakes. One of them is actually a friend I met through my ex boyfriend, and we just kept in touch. He was born in Japan and worked in the US for a while, then moved back. He is mostly disgusted with the lack of organization and communication consistency going on in the country in the wake of the disaster. My other friend is a Tennessee native who moved to Japan to teach English, and wound up marrying a Japanese man. She lives there now, too. She recently touched my heart by sharing about her experience in shelters, not knowing whether her husband, who works in another city, was even alive.
I'm wondering what kind of impact I can make on my students and perhaps help the victims of this disaster somehow. Fundraisers and charity collections are really restricted in my school district; there's so much red tape, it's ridiculous. But at the very least, maybe I can help my students understand that yes, even though this happened very far from here, those folks are people too.
I know it's nowhere near the magnitude of what happed in Japan, but these kids do remember last year's flood in middle Tennessee where we all live. Their own little down was very heavily damaged from flooding, and we were very fortunate that our school building did not sustain any damage. Still there were students of mine who lost their homes.
I dunno... my brain is still kicking the idea around. But we're gonna start folding. Any of you out there in cyberland: maybe you've got a thought about how to best tie all this together? Please share!

Sunday, March 13, 2011

Zentangle Swap


I just created a swap on Swap-Bot! Wow, I feel really productive. Now you can be productive by going and signing up! :) Click Here.

Thursday, March 10, 2011

Zentangle Inspired ATCs with Little Words


Here I go combining three things into one...mostly because I'm obsessed with Zentangle at the moment. I expect to remain obsessed right up until half my students are done with the project, then I'll be sick of it and have to suffer through the rest...but maybe not. Haha!


I am also a member of Swap-Bot, and participated in a swap involving little words. We swapped a little bunch of words with our partners and then made ATCs from the words. Here are mine.


Wednesday, March 9, 2011

Zentangle Challenge


I've been so into the Zentangle thing lately that I decided to try this challenge from a fellow blogger. "Something Blue" was designed to break out of the usual black, white, and gray palette of a typical Zentangle. I made two examples.


I can't wait to try these with my students once they finish their current project!

You can find the original challenge here. http://iamthedivaczt.blogspot.com/2011/03/weekly-challenge-12.html?showComment=1299697743330#c2903272555156525640

Thursday, February 24, 2011

Zentangle Inspired Art


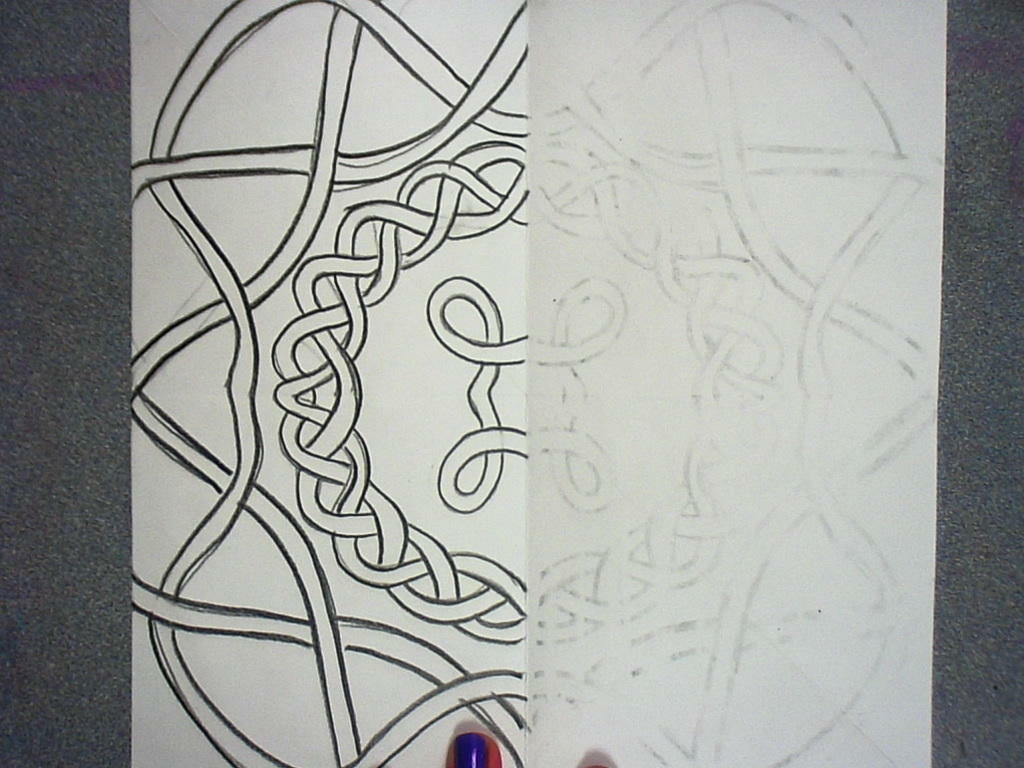
So apparently this is a "thing." I never catch on to trends until they are almost no longer trendy. But I ran across the idea of Zentangles when I was searching for artist's trading card swaps. Zentangle is basically a glorified doodle on a 3.5 inch square of very nice paper, using very nice pens. The patterns are supposed to be slighly variant within themselves, not just perfect repetitions. If the size or media is different is is not technically a Zentangle, it's "Zentangle Inspired Art." So I guess that's what this is, since it's 2.5 x 3.5 inches. If you want to know more, this site is great. They are pretty persnickety about the "rules" of Zentangle, though. I dunno, I think the point is more to relax and draw, and let your mind focus on that instead of your day-to-day stress. Doodling is a natural habit for many people. I feel like I am tuned in more to a lecture if I am doodling while I'm listening.


Today I tried this with my 5th graders. A handful of them were finished with the current project, and while the rest of the class was finishing up, I showed them how to zentangle on an ATC. I had them use prismacolor premier fine line markers, (which my awesome principal got for us for free!) and showed them how to pencil in a border and a few strings, sectioning off their drawing for different patterns. They were so into it! As the other students finished the project, they wanted to Zentangle too. So I had the first group of students teach the newcomers. At the end of class, I told them that they had "homework": to teach another person to Zentangle. Would you believe it? The response was, "YAAAY!"