Friday, June 16, 2017

New Youtube Channel, Bullet Journaling

Hey, everyone!  You probably thought I was dead.  I'm not.  It's great.

The past couple years of teaching have been a real rollercoaster for me.  I was on a cart, I had major back surgery, I had a fantastic TA while I recovered, and I finally got my classroom back last year.  I will make a post about mobile art programs sometime in the future.

But for now, let's talk about something that has helped me deal:  Bullet Journaling.  If you're unfamiliar with the system of Bullet Journaling, invented by Ryder Carroll, here's his original video on the topic.

Now, as a human with anxiety and ADD, I had always struggled with stress and organization.  But in my experience directing youth theatre, I found that organization is essential for dealing with stress.  I found that since theatre was something I was passionate about, I prioritized it in a way that made working on all aspects of it feel good to me.  I enjoyed the very act of creating calendars and rehearsal schedules.  But I found using online resources designed for this to be tedious.  For me, an analog system turned out to be best.

When I began running Dungeons & Dragons games for my friends, I was looking for ways to index notebooks, and I came across this system.  I implemented it for my notebook, and I found that planning for that became exponentially more enjoyable, as well as productive.

And so in January 2017, I made a New Year's Resolution designed to level up my life.  I wanted to do adulting for real.  I was so tired of missing deadlines and having long stretches of time when I was working on too many things at once, only to never finish any of it!

As I set up my journaling system, I was intimidated by the beautiful folks like Kara from Boho Berry, who showed me what a true work of art these journals can be.  But I folded in my knowledge from art school:  a sketchbook is for you.  You don't have to show anyone.  It's utilitarian.  I mean I wanted my notebook to be a joy to look at, but I also wanted to feel like I could actually use it without fear of ruining my pages if I made a mistake.  Here's the fabulous Kara's video for some inspiration:


So what you'll see below is a walkthrough of my almost complete Bullet Journal for the first half of 2017.  Incorporating my lesson goals into each week made my entire school year flow so much more smoothly.  I was able to see when I had free time to accomplish certain tasks, but I also grew to know how much time I could expect to take doing certain things, and plan accordingly.


Lastly, and probably most importantly, this has allowed me to control my ADD and anxiety by keeping me accountable for tasks, and helping me to feel productive every time I check something off.  I rarely struggle with the anxious feeling that, "I should be doing something right now...I am wasting time...but what do I want to do?"

And I found that having this notebook with me wherever I went was a huge comfort to me.  I really love when someone asks me if I'm free on a certain date and I can open it up and check what I'm doing months in advance.  I suppose people who like Google Calendar and the like can do the same thing...but they can't glue in ticket stubs, or the sticker they found on the sidewalk while they were out for a jog, or create custom headers in whatever hand lettered font they want.  Only us analog planner people can do that.  :)

Friday, September 25, 2015

Hey I'm Back! And Obsessing over the Mayans...

Greetings!

After a kinda long and crazy year last year (there was surgery involved) I am back to being my spunky self and the first finished artwork of this school year is going up!

This year I am particularly pumped about a Mayan inspired project I've been doing with Third Grade.  As you might know, I do a global continent theme with the kids, and Third Graders study Mexico, Central and South America.  This summer, during a teacher workshop, we had lunch at Chipotle, and I saw their awesome Mayan glyphs in the restaurant.  I thought, "I am in love with these, and I bet the kids would be, too!"  So here's what I did:

First we had a whole class dedicated to talking about and exploring the culture of the Ancient Mayans.  I showed this video: https://www.youtube.com/watch?v=og0cY1gGWG4

And we talked about Mayan numbers, and the calendar, and so forth.  It was so fascinating to me and the kids that time went by super fast, and we had just enough time at the end of class for them to write Mayan numbers in their sketchbooks, and practice drawing a few simple glyphs for common Mayan words:
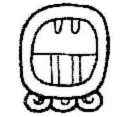
This one means "sun."  Obviously the sun played a huge role in Mayan beliefs and culture.  Their calendars are amazing!  And no, they weren't wrong about the world "ending" on December 21, 2012.  They didn't predict that at all; just the end of a very long cycle and the beginning of a new one.  :)

This one means "maize."  The Mayan Creation Story is fascinating and explains why maize was so important to the Mayans.  Check this video out.  (May be a little gross for littles) https://www.youtube.com/watch?v=Jb5GKmEcJcw

And this glyph means "moon."  Notice the three dots in the middle?  I think their arrangement may have something to do with Orion's belt and the Orion Nebula, which was also possibly very important to the Mayans.

This was one of those lessons that prompted the kids to investigate on their own.  They checked out library books, and did internet searches to learn more, just because they wanted to!  They asked me questions as we passed each other in the hall.  They came up to me before and after school.  This was a hugely engaging topic!

So then the time came for us to create their glyphs.  I decided to use the Mayan syllabary chart to convert their names into syllabic symbols.  (Sort of like Japanese I guess)

This Pdf was a fantastic resource for me, and I read it, and was basically able to do the project from there.  http://www.famsi.org/research/pitts/MayaGlyphsBook1Sect1.pdf

We practiced breaking their names into syllables and writing their respective syllabic symbols.  That took another entire class.

The following class, I demonstrated how to combine their symbols into one glyph.  They then cut themselves a small piece of recycled cardboard, about 3x3 inches.  I didn't bother asking them to make perfect squares, and this turned out to make them look WAY better as a result.  I love the way they look displayed in a clump.

Anyhow, after cutting their cardboard, they traced the shape of it in their sketchbooks.  Using that shape, they drew their glyph in pencil, then cut out the sketch, which was then the exact size of their cardboard.

I cut a piece of gold tooling foil and wrapped the edges of it around their cardboard.  Then, they taped their paper pattern to the foil and traced it onto the gold foil.  The resulting impressions were pretty darn cool looking, but I wanted to make them look "ancient."

So the next class, i had them use a tiny tiny bit of black block printing ink (this was what I had on hand.  It's probably easier to use india ink if you have that.) and stippled it onto their foil just in the areas where they had indented lines.  Next, and this may sound weird but it worked GREAT, I gave them a blob of Germ-x squirted right onto their project.  Using their fingers, they smeared the ink into the grooves they'd drawn, then wiped away the excess with paper towels.  This was messy, but awesome.  :)  Some of them wanted to polish theirs a bit more, so we used Clorox wipes to do that.  Turns out the Clorox wipes removed a bit of the gold color on the foil too, and that made them look even more interesting in my opinion!  

I had them stick magnets to the back of the project before we inked them, but this is completely optional.  My intention was to display them by sticking them to this metal railing at my school, but they didn't stay very well, and I ended up duct-taping them to the wall instead.  Here's my finished example:


And here's how they looked on the railing:

And now clumped on the wall.  I used a twisted long piece of duct tape to stick them on and they have stayed up very well so far.  I like this look better, but if you've got a good spot to stick these with the magnets, that might look fabulous, too.  


Saturday, August 9, 2014

Happy August, Everybody!

School's already started back?  WHAAAT!?  Seems like it's earlier every year.  Anyway, here's a little update on me.  

Our school is pretty severely overcrowded at this point, and I'm still in a mobile Art situation.  At the end of the year last year, I was asked if I would prefer to move to the former concession stand near the gym and the music room, and I jumped at the chance.  My previous office was small and had carpet.  This one is twice the size, has linoleum flooring, lots of countertops and cabinets, and best of all, a sink!  So it's much more conducive to arty-ness, even though it's still not the same as having an actual classroom.  This location is pretty ideal for me, being near the gym and the stage for theatre things, and near the music room for collaborating with my Fine Arts buddies.


There are moments when I still feel overwhelmed, but I do feel like I'm better equipped this year to make the program work.  And yes, that is the TARDIS on my office door.  At first, I did that for me, just to add a little personality to the space, but then I decided to make it relevant and cuter by adding "Imagination makes you bigger on the inside," above the door.  Already had some compliments on that!


This year we are on an 8 day color rotation.  And since the specials teachers almost all have an additional part time teacher, that makes the planning piece very complicated.  It's going to be pretty near impossible to coordinate on a lesson that keeps pace and is consistent across a grade level.  So my co-teacher and I have decided to have her teach her own self contained lessons, focusing primarily on art criticism, since that's what I tend to leave out due to time constraints.  I will let you all know how that turns out!

But for now, HAPPY SCHOOL YEAR!


Tuesday, April 15, 2014

The Spring Play

This is the time of year when my students start bringing me fun sized Snickers bars.  It's a  bit of an inside joke, actually.

I am the sponsor for my school's Drama Club (which we change the name of just about every year).  And it's almost time for our Spring performance.  We already have one show under our belt as a group:  the Vaudeville Variety Show we put on in November.  It was super cute.  We had a ventriloquist, and a dancing gorilla, and George Burns, and Abbot & Costello.  It was a way to sing and dance a little, get some stage experience and teach a bit of history at the same time.  Did I mention I teach at an ELEMENTARY SCHOOL?  Yep.  I'm pretty sure I'm the only Elementary Art teacher in the known world who is brave (read: crazy) enough to take on directing a group of 42 aspiring actors in 3rd thru 5th grade on top of teaching full time.  But it's something I've always done since I started teaching.  (Guys...I'm so sleep deprived right now that the first time I typed that, I wrote "teachering.")  In fact, I think it's what helped me get hired in the first place.  In my interview I asked if the school had a program like this, and mentioned that I would love to create one and help the music teacher with her shows, etc.  So after growing up as a theatre kid, here I am instructing young minds on how to project their voices whist wearing itchy, homemade costumes and sweating under our stage lights.  

Anyway, back to the Snickers.  I explained to my theatre kids that when we get close to performance time, Miss Teacher morphs into a fire breathing dragon who thinks you're about to steal her gold.  She is tired and cranky, and even though she still loves you, she isn't herself.  She might yell at you for making a minor mistake, or maybe for a huge mistake, but she probably is just HANGRY.  She just needs a Snickers.  Thus, these adorable and hilarious kids have started investing in some  Snickers Insurance.  On Valentine's Day, one student brought me the biggest Snickers bar I have ever seen.  She said, "Just in case you need it this afternoon when we're blocking that crazy scene."
 
Show is in 10 days.  Eep!

Monday, March 31, 2014

Black Glue (tested and improved)

Most of the time when I use something from Pinterest, I test it first.  But as things are now, being a mobile teacher, I don't have much time to test things before I just have to throw them into my lesson.

Thus the black glue mess.

I was trying to do a Kandinsky-inspired lesson with the kinders.  I coordinated with the music teacher and we did a joint lesson about Jazz music and how that relates to Rhythm in art and the artist Kandinsky.  Then I had the kiddos draw with crayons to re-create the feeling of the jazz music we were listening to, keeping them focused on making lines and shapes; abstract, not representational.


Then the plan was to edit their crayon drawings, and pick what we liked the best, then recreate that on a new piece of drawing paper using the black glue you see all over pinterest, then color in between the dried glue with chalk pastels.

"Oh, it's so easy!  Just mix some black tempera or acrylic with your white glue and away you go!"

NOPE.

Wasn't that easy for me.  First of all, I had to find the right kind of glue.  The Elmer's worked fine, but the off brand melted the black paint and wouldn't mix at all, nor would the crayola glue.  (It was too thick.)

So once I had a billion little bottles mixed up, I gave them to the kids and woops!  "MINE WON'T SQUEEZE OUT!"  "MINE'S COMING OUT GRAY!"  "MINE'S BROKEN!"

Don't you love it?  My glue is broken.  Lol.

After dealing with all of that, I then realized I would have to refill the bottles for the next couple of classes, because they got used up pretty quickly.  And refilling the bottles with glue AND paint and mixing them before the kids had to use them?  Nope.  Didn't happen.  There just wasn't time.

So here's what I did:


I made use of an almost empty bottle of black tempera paint; the one that still has paint in it, but not enough to be pumped out by the gallon paint pumper, and I poured a bunch of bottles of Elmer's into it.  Then I closed the lid tightly, and rolled it up and down the hallway, and shook it up.  It mixed up great!  That was WAAAY easier than mixing 30 individual bottles!  Now I can refill the black glue bottles from my big one, and I know the mixture will be the same consistency with all of the bottles!

I did this in the hallway, too, by the way.  Lol.

Friday, March 28, 2014

Homeschoolers Welcome!

It's come to my attention that a fair few of my followers are homeschoolers (or just regular parents) looking for arty project ideas to try at home.  How awesome is that!?  Way to go, you, for nurturing your child's creativity at home!  If I had a Super Parent badge, you'd have earned it!

Of course my blog isn't really designed specifically for you guys, but I am glad to have you here!  My main intention is to share lesson and process ideas with other teachers who are working with large groups of kids.  I just share my experiences, and the choices I have to make given my specific situation, and what's available to me at the time.  So just because I didn't think to use something that seems like it would work better for you, don't be scared!  In fact, I'd love it if you would share that idea with me!  Comments make me feel all fuzzy inside!


Faux Batiks with First Grade, Cleanline Resist and Lumi Inkodye

I've had some interesting results with my faux batik project.  We began by studying the batiks of Africa, which is our theme continent for this grade level.  I then gave the kids a piece of muslin fabric.  By the way, if you ever have to cut 150 or so pieces of fabric for some reason, remember it is WAY easier to tear it than to cut it.

The kids traced the outline of their fabric in their sketchbook.  Then, using that as a guide for sizing, they made a very simple drawing of an African animal, and perhaps a little decorative border.  In hindsight, I could have skipped this step, because they definitely made their drawings more detailed than they could ever recreate with the glue.  But it helped them to visualize their idea I suppose.

The fabric was see-through, so they were able to place it on top of their pencil drawing and "trace" it with the glue.  Drawing with glue is tricky, and that's why the images have to be super simple.  You may get better detail if you try using gel glue instead of white glue.  But I have that lovely crayola white glue, and I tend to reach for that most often.

After letting the glue drawings on the fabric dry, we painted over them with tempera. We used one color to help alleviate my logistical issues, but you could use as many colors as you want!

Then, the next week, when the paint was dry, I washed them in the sink with warm water.  I did this for each kid individually, so they could watch the paint come off the glue and stay on the fabric.  I didn't try to remove the glue from the fabric completely, because it would have just taken far too long.  I did that for my example, and I had to wash so much that the color faded too much for my taste.  But depending on how your operation is set up, it may be best just to throw all the batiks in your washing machine without detergent.  The tempera will stain the fabric, and the glue should be completely removed.  I haven't tried that.  I wasn't going to put 150 of them in my washing machine at home for obvious reasons.  :)


I removed the glue from the fabric completely.  But my piece of fabric was about twice the size of the ones I gave the kids.  I tried to do a little gradient with the black and the blue, but it didn't turn out very evenly.  It has sort of a tie-dye look, though.


And here's a kid example.  The color is much brighter, because they dried for a week before we washed them; plenty of time for a nice stain to set into the fabric.  And you'l notice that the white lines are a bit shiny, because the glue is still there.  The kids were happy either way, and this kept the color nice, so we went with this method.

Overall, I'm really happy with these results.  I've been wanting to do a faux batik lesson with kids for years, but I never quite found my groove with it.  I've tried this similar technique on paper before with mixed results, and I've tried the chalk and glue method too.  Here's a link to the Frank Lloyd Wright project I did a few years back.  

It is also noteworthy that if you are doing this with older kids or for yourself, you might want to try Cleanline Resist instead of glue.  It's designed more for batik.


I used a brush to apply the resist to fabric, testing how much detail I would get, and what difference the thickness of the applied resist would make.  You could then use the tempera method described above, or dye of some kind.  You might want to try the Inkodye.  It's a light sensitive dye which can be used for anything from batik to t-shirts, to faux cyanotypes.  I added the dye over my resist, laid it out in the sun and then washed in the sink.  Here's the result:


Because I'm a photography nerd as well, I am gonna have to try this with film negatives!  The instructions make it look super easy.  Now I just have to wait for the SUN TO COME OUT!  :)


Let me know about your experiments with batik!

Thursday, March 27, 2014

Trial and Error

So I've been adapting most of my lessons to the mobile art program pretty well.  But there are definitely some things that have to be changed completely.  Anything that I would normally put on a drying rack now has to go out in the hallway against the wall to dry.  The littles are used to doing this, since they make a lot of projects in their academic curriculum that need drying.  But the big kids?  It was weird to them, and so part of me just wants to nix all that with the big kids.  Their work got stepped on a bit, since they are more rowdy and have bigger feet, I guess?

I was trying out a faux batik lesson with first grade, and the process was to "draw" on muslin fabric with white glue, then let it dry.  Next day, paint over the entire piece of fabric with bold colored tempera paint.  Since I'm on a cart, I gave everyone blue paint.  I couldn't deal with multiple colors of tempera in a room with barely any space to walk between tables, and ONE sink.

The other teachers have been very receptive and accommodating for the most part.  My school is awesome, and my colleagues are the best.  Seriously.  One teacher said I could just leave the wet projects at the kids' seats, since they are my last class of the day and that way, each kid would know which one was theirs without having to mess with writing names on fabric.  I hope I didn't stain her tables blue with paint.  

I have assigned helper kids to collect work at the end of the day once it's dried, and put it back in their portfolio box, but I really don't know if that's happening or not.

The hardest thing for me is when I've made my example, and it worked fine for me, but then when I get in the room, something malfunctions and I have to switch gears on the spot.  I can't leave the room, and I can't send a kid to fetch something, since my stuff is all spread out in various places and I don't even know where everything is offhand.  Most often, I run out of paper, or there's a new kid in class who doesn't have a sketchbook yet, and I have no way to make him one right there.

Another thing I'm struggling with is figuring out a way to have "I CAN" statements posted for my lessons.  I can put them in the powerpoint when I introduce a project, and I can reiterate them while I'm teaching, but the only other thing I can think of is having the kids copy them in their sketchbooks.  That takes a lot of time though, and when I'm already losing minutes setting up, traveling to the classes, and cleaning up, I'm not sure I'm willing to take 20 minutes for a whole class to copy a bunch of objectives.  I could also have them posted on a white board that is attached to my main cart somehow, but it would have to be HUGE to fit everything.  Maybe a flipchart or something?  But again, more stuff to take with me everywhere...

I also get a little frustrated when kids explain to me, "Oh, everybody will be quiet if you just ring the bell," or whatever their classroom "thing" is.  I cannot remember 35 different things for 35 different classrooms. Oi vey.

Also, if I take my laptop with me to the classrooms, so that I can access all my files faster, I inevitably have to reboot entirely so that I can connect to the network in that room.  But that's just a technology glitch. 

So every day is different.  I keep a binder with me that has my lesson plans, class lists, and schedule.  And on each grade level cart, I put the project example.  Yes, I trust the kids not to touch it when it's out in their hallway.  Maybe I shouldn't, but so far, so good!  Ha!  Sometimes I can't even get the cart into the room.  There are so many desks and obstacles in each room and the layouts are completely different, sometimes from week to week!  Our teachers, being so fabulous, like to change up their seating arrangements frequently, which is good for the kiddos but not for me.

I hope that by sharing my experience I can help somebody out who's going through this transition!  I would love to hear about your own situations, too.  Maybe we can put our heads together to solve some of these challenges!


Tuesday, March 25, 2014

Here Comes the Art Mobile!

Hey there.  Sorry I haven't made a post in like - forever!  Been kinda busy.  This January our school's overcrowding got out of control and I have been (temporarily - probably) placed on a cart.  My classroom is now full of kindergarteners.

I have learned a lot so far about what works and what doesn't.
(Pictured:  Unit 00.  This is the cart which I take to every room, sometimes I park it outside the class, or inside, depending on how much space there is in the room.  I didn't clean it up or organize it for the picture.  I wanted to be real with you guys.  It's got my water bottle, project examples, my time timer, drawing books for sketchbook time, glue sticks, markers, scissors, and a lot of nasty pencil shavings which I can't seem to control no matter what I do.)


The first thing I asked for was to have a separate cart for each grade level, and another main cart with basic supplies everybody can share, as well as my planning stuff.  That works pretty well, except when I fail to think about the fact that I need that box of pastels for second grade in the afternoon and fifth grade has it in the morning and I have zero minutes in between classes to go and get it.

(Pictured:  Art Mobiles on their hallway, my paper storage drawers, and the blue class portfolio bins)


Thus, I employ children.  That's right.  Child labor!  No.  Just kidding.  But I do give a lot of "helper" jobs to each class.  I have four helpers whose job it is to push into and out of the rooms, and on to their next destination.  Sometimes they get to push the button on the elevator.  This is a big deal.  Then in addition to that, I have two or three helpers to get the class portfolio box, which I keep on the hallway as well.

So all that's going ok.  I was disappointed that I couldn't do clay with the kiddos this year, but fourth grade has made some cool paper sculptures of Classical columns, all working in their groups at their own desks in their fourth grade classroom.

So other than all that, it's going.  If you are teaching from a cart, please share with me what you've learned so far!  Hopefully by the time I get used to it, I will be in a classroom again, but still!  :)

Wednesday, September 4, 2013

Light Painting

Recently I asked my friends to do me a huge favor and light some sparklers in the front yard.  This was a huge favor because it was the 4th of July and it was pouring rain all day.  They were so mad at me, but then I gave them cake so it was all good.  Here are a couple of the shots I got:


So then I thought I should try this with my students.  Without fire, of course.  We set up my camera in my closet at school, so it would be plenty dark in there, and I gave them a couple of flash lights.  We discussed contour lines, and I showed images of Picasso's light paintings.  So far they are coming out extraordinarily cool.  I can't post them since they mostly have kids in them, but here is one of mine: 


Neat!  I'm using a little LED flashlight.  Laser pointers work, too, but you have to go very slowly drawing the lines, since red light travels more slowly, apparently.  The best results I've gotten were with kids tracing each others' silhouettes, and adding interesting imaginary details.  I've seen mermaids, fairies, angels, wizards, etc.  My camera shutter speed is set on BULB, and I have a remote control shutter with a lock on it, so I can click it and it will hold itself down as long as I want it to.  My F-stop is 25, the smallest it could be with my lens, and the film speed is 100.  So in an almost completely dark room, I got no ambient light in the pictures at all.

There's my Deathly Hallows.
As long as you have a camera with adjustable shutter speed and a tripod, you can do this too!

Monday, February 11, 2013

Swap-Bot Swap Invitation

Second Grade Swap!

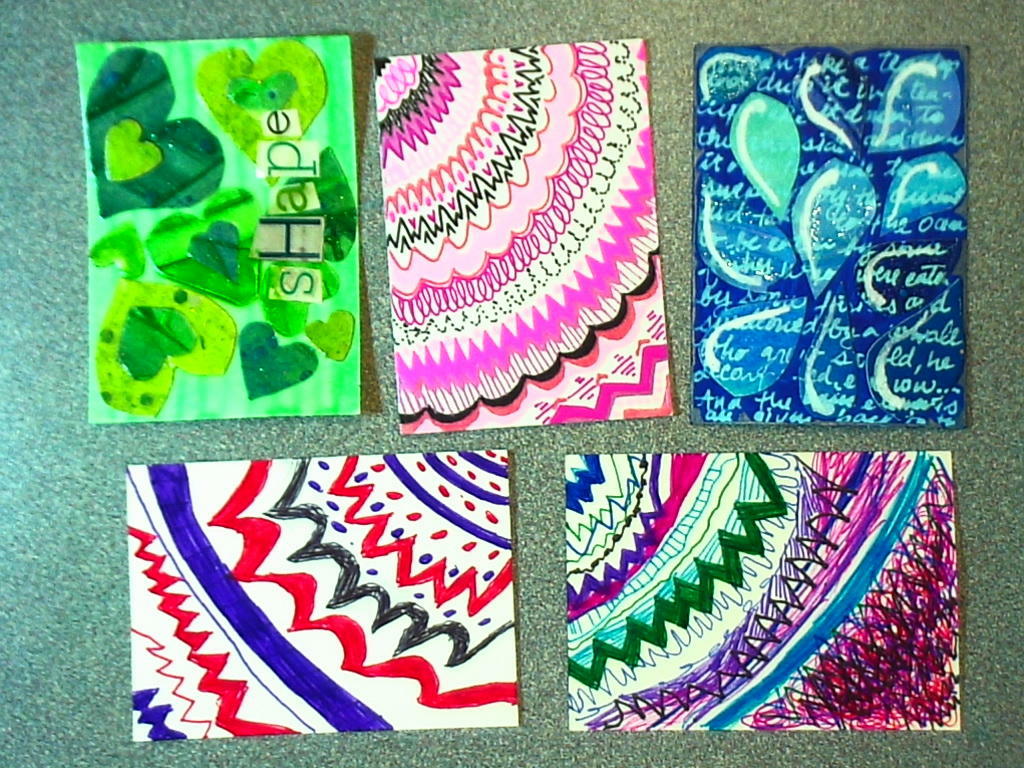
I'm an Art Teacher in Tennessee. I've got a whole grade level of second graders, about 150 or so kids. They are working on "mini" artist's trading cards right now. That's a size of card which I invented when we started running low on cards. I cut them in half, measuring 2.5 inches by 1 3/4 inches. My students are all making zentangles, but I'm not picky about how the ATCs are decorated. It would be great if they are all that mini size, but if that is not do-able for you, let me know.


I'm really looking for ONE other TEACHER to swap about 150 cards with. If you are a teacher and you'd like to have your class or classes participate in this swap, we can work out the details.

Here's a link to the swap if you're interested!  http://www.swap-bot.com/swap/show/140282

Tuesday, January 29, 2013

ATCs for Art Criticism


Sometimes the kids figure stuff out on their own, and that's a beautiful thing.  We had made Artists' Trading cards, using Elements & Principles vocabulary.  Each kid in 1st and 2nd grade made two cards, and had a buddy class to swap with.  One card they kept, and the other was traded.  When they received the cards from their buddy class, a process which I kept random, some of the kids had cards that looked fabulous.  Others were not so lucky.  But in any event, I split the assignment so the classes at the beginning of the week had the word "Line" and the end of the week classes did "value."  I wanted to take the opportunity to use the cards made by the buddy class as a way to teach the other words, and some of the students began commenting on their buddy class' craftsmanship.  "My buddy REALLY took their time! I can tell!"  "Mine probably could have colored this better.  But I like the shapes."  They were being art critics!  So, picking up on this, I started asking leading questions.  The best part was, nobody used names during the discussion, so nobody had their feelings hurt, but they could still look at the work and tell something they liked, and something that could be improved. 

A lot of the fun of doing ATCs this way was getting a surprise from another kid their age.  Most of them were really happy with what their buddies made.  There were a few classes that had different numbers of kids, so when I was introducing the lesson, I saved all my examples I made and let the kids who didn't get a buddy card choose one of mine.  Of course, mine were fancy, so they didn't feel jipped.  ;)

Teacher examples on top, kid examples below.

Tuesday, December 11, 2012

European Folk & Fairy Tales

Yay!  It's been a while, but I'm still here! 

For this project, I wanted something a little quicker so they could finish before the holidays.  I decided to have 4th grade do an illustration-inspired project with European folklore.  Mainly I was inspired by Wil Huygen's book Gnomes.  This book was one I remember checking out from the library over and over as a kid.  The illustrations are gorgeous, and much of the text is hand-written, as if this was a sketchbook that the author took with him as he observed the actual gnomes.  I do let the kids look at my copy, even though there are a couple of nekkid gnomes in there.  As always, I employ my "If you can't handle it, turn the page" policy when it comes to nudes in Art.  As my first boss (a NUN!) told me, "As long as it isn't of a sinful nature, the children should be allowed to see it."  After all, how many nude Baby Jesus-es are there out there in the Art world?  Huh??  I digress.

 I asked them to choose a fairy tale character or creature, or something from a European legend, such as a leprechaun, a dragon, or the Loch Ness Monster, then create a small illustration.  Using EMPHASIS (sorry, I'm so used to typing the vocab words in all caps) they will add the name of their creature in decorative letters.  For the background, they will create a texture using text.  Get it?  TEXT-ure.  Har, har.  I'm having them research their creature and write some info to texturize the background.  My county has this nifty technology initiative, so it's ok for kids to bring wi-fi enabled devices, such as iPods, and Kindles to school.  They will use those in my class for their research.  (But I also cleaned the library out of resource books so they could get some ideas, and so they could share the books and the tech.)

So far they are pretty excited, and I like that I'm integrating the technology.  (Go me!)


Here are my finished examples.  I can't decide which will really work best for my intention of this being a quick project.  I may even cut the paper down to quarter pages, as well.  The tea-dye process takes an extra day, but perhaps they can do that on day 2, when they will mostly still be sketching and taking notes for their research.


Thursday, September 20, 2012

Markers: The Joy of Mr. Sketch


Oh, the joy.  Smelly markers!  This week, I've decided to introduce my 2nd graders to the sheer wonder of Mr. Sketch markers, and all the world is beautiful and fruit-scented.  My classroom smells like a box of Sweet Tarts.  I have been teaching them to "paint with the markers" and so far they are taking care of the fragile felt tips very well.  This takes discipline for 7 year-olds, but they agree that it's worth it for the aromatherapy benefits.  Ha!  I didn't get into the aromatherapy thing exactly, but the markers do in fact have a calming effect on the kiddos.  You think I'm kidding?  They work on ME, too!  Baby, when I crack these open, I feel like that jumpin' watermelon on the box.

Here's why I love this product:  They last about 3 times as long as Crayola markers, they come in better colors, and the chisel tips are versatile.  Plus the casing of the markers are the actual color, instead of just being white with colored details.  All these things make them  more expensive, but I've come to see that they are definitely worth the cost.  But here's a tip:  DON'T BUY THE CLASSROOM PACK.  Those come with weird foam tips on them, and while they still work just fine if you get used to them, they are not nearly as brilliant as the felt tips. 


Classpack (pink) vs. 18 color pack (purple) 


The classpack also only has 12 colors.  I like to just buy a couple of 18 color packs, and split them into warm and cool colors.  Some of my projects only require warm or cool colors, and also this reinforces that concept all year!


I find that this also saves time when kids are putting away supplies. 
 
Ok.  So how do you keep the kids from turning the lovely chiseled felt tips into furry fluff balls with no ink left in them?  Paint with markers.  I get 'em young, and when I first crack open the markers, I show them how to color.  I say, "You think you know how to color?  Well, watch THIS!"
 
Then I show them how coloring in a zig-zag motion takes forever, and the markers don't look as pretty.  I show them to color in a downward motion, in one direction. 
 

Yesterday I kept saying, "Go in ONE DIRECTION.  ONE.  DIRECTION."  Of course, a kid burst out singing, "Baby you light up my world like nobody else..."  And I laughed myself sick.  Then I had to play the song just to get it out of my head.  I am probably going to make a poster using the One Direction album cover, and replace all their faces with Mr. Sketch marker heads. 


UPDATE:  I made this. 


Tuesday, September 18, 2012

Alice and Op Art

Right now I have a group of 5th graders whom I adore.  I've taught them since they were in Kindergarten, and this is the first time I've been at one school long enough for that to happen.  They have a great attitude and a wonderful sense of humor.  But they are very talkative.  It's not even that they aren't on task while they are talking.  They are perfectly capable of multitasking, but the noise is just over the limit for me.  I've got a pretty low standard for how quiet an Art Room should be, too.  I feel like I'm giving a test if the kids aren't talking.

Though lately, using the sketchbooks, I've learned to let go and be ok with silence.  Silence means the kids are concentrating, and I need to shut my big yapper and let them do that sometimes.  By the way, the sketchbooks are my new favorite thing altogether.  I even make the kids write down the daily directions, so that if they don't make it all the way through, they can pick up where they left off.  But more often, it becomes my way of answering those, "What do I do now?" questions.  (Which I HATE.  Kid, I told you already what to do next.  Don't just SIT THERE!  Well guess what, thanks to the sketchbook, that kid has already written it down, so now he remembers and is less likely to ask me in the first place.  Yay!)

Anyhow, I was just enjoying talking to this group of 5th graders while they worked, and I realized, they were all listening to me tell them about my weekend.  They were listening intently.  But still simultaneously working.  So I printed off a funny blog entry from one of my favorite blogs: Hyperbole and a Half.  I read it aloud to the kiddos and made them promise to listen and work at the same time.  They loved it.  This blogger is fantastic by the way, and if you've not read her stuff, go read it this second.  You will laugh.  But she does use some strong language, which I don't mind, but I did edit when reading to the kids.  I particularly like the ones about the cake and her dogs.

But today I ran out of cool blog entries to read.  And I thought, "Why not read them something longer, so that I don't have to keep searching for short stories?"  On my bookshelf is a tattered copy of Alice and Wonderland, which was mine as a kid.  Kids don't read stuff like that anymore.  I thought, hey, they probably wouldn't ever pick this up on their own, but I can read it to them and maybe they'll see that old books are still good books.  Turns out, this book is very engaging, but still allows them to concentrate on working, because they sort of already know the story.  Not only that, but the idea of Op art, which they are making now, and the dreamy, psychedelic flair of Alice go together well.  We finished chapter one just as it was time to clean up today.  It was Art Zen.


On a related note, I found a lovely site with all the original Alice illustrations here.  They are ever so slightly disturbing which makes them cool enough for 5th graders to appreciate, I think.

Monday, September 17, 2012

Keep Calm and Don't Be a Squirrel

I have recently decided that I probably have a mild case of ADD.  Perhaps this has developed in my adulthood, but perhaps I've always had it and just never chose to do anything about it.  I do remember getting very easily distracted when I would try to read, and especially if there was music or TV playing somewhere, I couldn't help but zone out and listen to that.  This is probably related to my ability to remember large amounts of song lyrics, while very little useful information is retained.  Musical theatre kid problems?  If I had a dollar for every time I got distracted I would...oh snap, is that CAKE?

*runs away*

See what I mean?  That's me.

In whatever case, I get very easily distracted when I am teaching.  Kids love to raise their hands, stop me, ask innane questions, and then I can't even remember what I was talking about after I remind them that they could have asked me that later.  They love to interrupt me by saying, "OOOOOH!  Did you make that?!?!"  Yes, kid.  I made that.  I'm the art teacher.  Stop being so surprised by my awesomeness.  Then, another kid yells, "Did you make THAT?"  No kid.  That is the Mona Lisa.  Then I try to ignore the spiraling feeling that they don't listen to anything I say.  It's gotten to the point where I hardly ever call on anyone until I'm finished with the instructions, and then I ask for questions.   

I have round stools in my classroom.  They are the bane of my existence.  Not only are they poorly constructed and uncomfortable to sit on, they squeak like crazy whenever a kid moves, and kids inevitably wiggle back and forth on the legs, leaning one way or the other until BAM!!  The stool falls over and the kid is lying on the floor, stunned.  Obviously that is a huge distraction for me.

So I have started trying to impress upon the little angels that they need to help me out with my distraction problem.  I don't call it ADD, but they know what I mean when I say, "I'm very easily distracted."  It occurred to me that in a way, I am very like the dog from the movie Up. 


You remember him, right?  Adorable.  Remember how he would stop in the middle of a thought and stare at a squirrel?  I've stolen that, and started saying to the kids, "Hey, kid.  You're being a squirrel right now."  That, I suppose, is a lot nicer than me yelling, "HEY!  STOP IT WHATEVERYOURNAMEIS!  I'M TEACHIN' HERE!"  Not that I would say that in the first place...ahem.
 
So far they seem to think it's cute, and it's been working.  This success prompted me to make a poster. 
 
 
You can make your own customized poster here.  It's pretty cute.  Although I would have preferred an image of a squirrel at the top, I put the dog.  I probably could have made my own using Word, but this was too easy to pass up.


Wednesday, September 5, 2012

Pencils and Why they Bug Me

Lately I've been really getting annoyed at how long it takes kids to choose and sharpen pencils.  It's about as long as it takes me to pick out something on Amazon.com.  It has to be the PERFECT one, in the right condition, and shipping from as few locations as possible.  Many of them also feel the need to choose erasers, since I purposely rip the ones off the back of my pencils due to latex allergies at our school. 


Erasers are my next biggest annoyance.  I used to buy the cool neon cap erasers, but those seem to somehow exit my classroom very quickly.  Then I tried the chunky colorful ones, and those exited the room even more quickly.  So I bought ugly gray erasers, and chopped them all in half.  Now the kids abuse them, and they look like rotten little teeth.  :(


I'll admit, when I was an elementary lass, many years ago, I used to be very OCD about my pencils, too.  They all had to be sharp all the time.  I never used the erasers on the back, because I wanted them to stay intact.  I would put a cap eraser on all my pencils.  Once they got sharpened too much, I stopped using them because my hand would get cramped.  There were certain pencils I saved in a zipper pouch and never sharpened:  glittery ones, Lisa Frank unicorns, scented ones, pencils from travel destinations, and some given as prizes for good behavior or 100% on a spelling test.  Yes, children, I feel your pencil pain.  However, when I see you for 45 minutes once every six days, you're going to have to get over your pencil issues.


Since I've introduced the sketchbooks, I've been having the kids write down their objectives for a lesson, and a few (less than a paragraph) notes about the topic.  So instead of me just rolling on into my speech about the lesson, and having the kids sit there listening, I have to wait 20 MINUTES for them to sharpen a pencil?  NO.  NO, I SAY!

This may sound like a simple solution, or maybe you think I'm crazy, but I am making the kids USE PENS.  Think about it: no sharpening, no erasers to pick out, no whining in the middle of my speech because theirs broke!  It's a beautiful thing.  Not only that, but while working in their sketchbooks, using a pen teaches them not to erase and worry about every little detail.  They have to try again or just let it go.  And today, the beauty of this theory was tested.  A teacher sent her students to my class with their own pencils, ready to go.

Y'all, it STILL TOOK THEM 15 MINUTES TO GET READY!  GAAAAH!

So, you know what?  I'm phasing out the pencils.  Maybe I'm crazy, but I could also be brilliant.  It's a possibility. 

Wednesday, August 29, 2012

Sketchbook Update

I love using the sketchbooks!  Today I decided to try having them out while I'm introducing a lesson and asking the kiddos to take notes.  EVEN THE SECOND GRADERS DID IT!  First grade did, too, but not to the extent of the older ones, of course, since the littles are still learning to write.  But hey, now I am helping to improve LITERACY!  Woohoo!!

As I was going through my slide show, I wrote on the board a few very simple notes about our topic, and I had them copy down the objectives for the project too.  (In our district, we call objectives "I CAN Statements.")  So for my Keith Haring  project, the I CAN statements were:  I CAN make patterns using lines.  I CAN show MOVEMENT in my art.  I CAN talk about the artist Keith Haring. 

I made sure the kids knew how to "Draw with Good Purpose."  This is derivative of the Quantum Learning Key of Excellence about Speaking with good purpose, i.e. not interrupting, using kind words, staying on topic, etc.  So drawing with good purpose means not wasting paper, using it for practice and kind things.  I really emphasised using ALL the space on a page, even if you had to turn it sideways.  I showed examples of lots of sketchbooks from many artists, including Leonardo DaVinci.  So we had a good long discussion about how to use the sketchbooks.  THEY ARE NOT BOOKS FOR FREE DRAW.  My oh my.

Look what they did!


I'm so proud!


Monday, August 27, 2012

CHOCOLATE PAINT!

Yes.  You read that right.  Paint.  It has chocolate in it.  It smells like chocolate.  It looks like chocolate, and it has a cool texture when it dries.

I am so excited, y'all.  As I walked into the hallway last week, I smelled something delightful and fruity.  I asked my Kindergarten neighbors what the scent was, and they showed me the strawberries they were painting, using strawberry jello and red tempera paint.  They had the texture of strawberries and they smelled divine.  The kids were having such a great time, I decided to experiment for my yummy cupcake lesson....

 
To make the chocolate scented texture paint, I added a little bit of jell-o pudding powder to brown tempera paint.  I stirred it up and saved it in a baby food jar.  It sat all weekend in the jar and hasn't dried up or gotten smelly.  (Except for smelling like delicious pudding!  *drool*)  I would probably recommend using sugar free jell-o to avoid getting little visitors in your room, but I don't know how that would affect the texture.  The white spots on my test paper are vanilla pudding and white tempera.  They didn't smell like vanilla until they dried, so I considered the chocolate more successful.
 
Anyhow, I am planning to do my Cupcake Lesson on Wayne Thiebaud very soon, and I wanted to add another fun element to the paint.  Last year I had puffy paint made with shaving cream which we used for icing.  So I think this year I'll have them make the cupcake bottoms with the jello paint, and add the puffy icing for two different textures. 
 
 
Here is the paint in the jar so you can see the texture when it is wet.  I am thinking later on when we make texture/value collage papers, I will use a little scented paint!  Hooray for JELL-O!
 
UPDATE:  (December 2012)  After trying the chocolate paint method above, I've concluded that since it dries VERY hard, it would work best on thicker paper, or cardstock.  I've since switched to a mixture of shaving cream, elmer's glue, and jello pudding powder for fluffier results.  Also, something about adding the jello to the mixture kept the puffy paint fresh for an extra day.  Previously, the shaving cream/glue puff paint would only last in the ziploc bag for one day.


Wednesday, August 15, 2012

Storage Solutions

This year I am trying something new for storing my students' sketchbooks and portfolios.  I found these mobile drawer units at Wal-Mart for $18 each.  The drawers come all the way out, and they can be taken apart, so I am still playing with how tall I want each unit to be.  I am indulging my OCD and making them all the same color, since there were not enough color options to use my color coding.  My problem is that if I stack them on the floor, I will have to bend up and down all the time to get the folders out.  If I stack them double on the counters, I will have to reach up high and I will inevitably drop entire drawers on my head.  So I have tried to stack them as high as I can stand, and use as little counter space as possible.

This is the kind of math problem that keeps me awake at night.  Luckily, everything pops apart easily.


Do ya like my curtains?  I'm going with blue this year, since it's calming and makes the room seem bigger.  I took a shower curtain rod and hot glued it to the cinder block, and hung fabric shower curtains up!  They are the perfect size for my windows!