Tuesday, December 11, 2012

European Folk & Fairy Tales

Yay!  It's been a while, but I'm still here! 

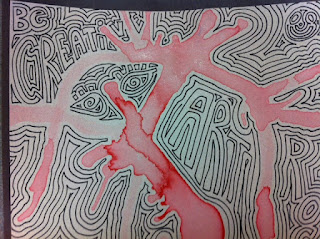
For this project, I wanted something a little quicker so they could finish before the holidays.  I decided to have 4th grade do an illustration-inspired project with European folklore.  Mainly I was inspired by Wil Huygen's book Gnomes.  This book was one I remember checking out from the library over and over as a kid.  The illustrations are gorgeous, and much of the text is hand-written, as if this was a sketchbook that the author took with him as he observed the actual gnomes.  I do let the kids look at my copy, even though there are a couple of nekkid gnomes in there.  As always, I employ my "If you can't handle it, turn the page" policy when it comes to nudes in Art.  As my first boss (a NUN!) told me, "As long as it isn't of a sinful nature, the children should be allowed to see it."  After all, how many nude Baby Jesus-es are there out there in the Art world?  Huh??  I digress.

 I asked them to choose a fairy tale character or creature, or something from a European legend, such as a leprechaun, a dragon, or the Loch Ness Monster, then create a small illustration.  Using EMPHASIS (sorry, I'm so used to typing the vocab words in all caps) they will add the name of their creature in decorative letters.  For the background, they will create a texture using text.  Get it?  TEXT-ure.  Har, har.  I'm having them research their creature and write some info to texturize the background.  My county has this nifty technology initiative, so it's ok for kids to bring wi-fi enabled devices, such as iPods, and Kindles to school.  They will use those in my class for their research.  (But I also cleaned the library out of resource books so they could get some ideas, and so they could share the books and the tech.)

So far they are pretty excited, and I like that I'm integrating the technology.  (Go me!)


Here are my finished examples.  I can't decide which will really work best for my intention of this being a quick project.  I may even cut the paper down to quarter pages, as well.  The tea-dye process takes an extra day, but perhaps they can do that on day 2, when they will mostly still be sketching and taking notes for their research.


Thursday, September 20, 2012

Markers: The Joy of Mr. Sketch


Oh, the joy.  Smelly markers!  This week, I've decided to introduce my 2nd graders to the sheer wonder of Mr. Sketch markers, and all the world is beautiful and fruit-scented.  My classroom smells like a box of Sweet Tarts.  I have been teaching them to "paint with the markers" and so far they are taking care of the fragile felt tips very well.  This takes discipline for 7 year-olds, but they agree that it's worth it for the aromatherapy benefits.  Ha!  I didn't get into the aromatherapy thing exactly, but the markers do in fact have a calming effect on the kiddos.  You think I'm kidding?  They work on ME, too!  Baby, when I crack these open, I feel like that jumpin' watermelon on the box.

Here's why I love this product:  They last about 3 times as long as Crayola markers, they come in better colors, and the chisel tips are versatile.  Plus the casing of the markers are the actual color, instead of just being white with colored details.  All these things make them  more expensive, but I've come to see that they are definitely worth the cost.  But here's a tip:  DON'T BUY THE CLASSROOM PACK.  Those come with weird foam tips on them, and while they still work just fine if you get used to them, they are not nearly as brilliant as the felt tips. 


Classpack (pink) vs. 18 color pack (purple) 


The classpack also only has 12 colors.  I like to just buy a couple of 18 color packs, and split them into warm and cool colors.  Some of my projects only require warm or cool colors, and also this reinforces that concept all year!


I find that this also saves time when kids are putting away supplies. 
 
Ok.  So how do you keep the kids from turning the lovely chiseled felt tips into furry fluff balls with no ink left in them?  Paint with markers.  I get 'em young, and when I first crack open the markers, I show them how to color.  I say, "You think you know how to color?  Well, watch THIS!"
 
Then I show them how coloring in a zig-zag motion takes forever, and the markers don't look as pretty.  I show them to color in a downward motion, in one direction. 
 

Yesterday I kept saying, "Go in ONE DIRECTION.  ONE.  DIRECTION."  Of course, a kid burst out singing, "Baby you light up my world like nobody else..."  And I laughed myself sick.  Then I had to play the song just to get it out of my head.  I am probably going to make a poster using the One Direction album cover, and replace all their faces with Mr. Sketch marker heads. 


UPDATE:  I made this. 


Tuesday, September 18, 2012

Alice and Op Art

Right now I have a group of 5th graders whom I adore.  I've taught them since they were in Kindergarten, and this is the first time I've been at one school long enough for that to happen.  They have a great attitude and a wonderful sense of humor.  But they are very talkative.  It's not even that they aren't on task while they are talking.  They are perfectly capable of multitasking, but the noise is just over the limit for me.  I've got a pretty low standard for how quiet an Art Room should be, too.  I feel like I'm giving a test if the kids aren't talking.

Though lately, using the sketchbooks, I've learned to let go and be ok with silence.  Silence means the kids are concentrating, and I need to shut my big yapper and let them do that sometimes.  By the way, the sketchbooks are my new favorite thing altogether.  I even make the kids write down the daily directions, so that if they don't make it all the way through, they can pick up where they left off.  But more often, it becomes my way of answering those, "What do I do now?" questions.  (Which I HATE.  Kid, I told you already what to do next.  Don't just SIT THERE!  Well guess what, thanks to the sketchbook, that kid has already written it down, so now he remembers and is less likely to ask me in the first place.  Yay!)

Anyhow, I was just enjoying talking to this group of 5th graders while they worked, and I realized, they were all listening to me tell them about my weekend.  They were listening intently.  But still simultaneously working.  So I printed off a funny blog entry from one of my favorite blogs: Hyperbole and a Half.  I read it aloud to the kiddos and made them promise to listen and work at the same time.  They loved it.  This blogger is fantastic by the way, and if you've not read her stuff, go read it this second.  You will laugh.  But she does use some strong language, which I don't mind, but I did edit when reading to the kids.  I particularly like the ones about the cake and her dogs.

But today I ran out of cool blog entries to read.  And I thought, "Why not read them something longer, so that I don't have to keep searching for short stories?"  On my bookshelf is a tattered copy of Alice and Wonderland, which was mine as a kid.  Kids don't read stuff like that anymore.  I thought, hey, they probably wouldn't ever pick this up on their own, but I can read it to them and maybe they'll see that old books are still good books.  Turns out, this book is very engaging, but still allows them to concentrate on working, because they sort of already know the story.  Not only that, but the idea of Op art, which they are making now, and the dreamy, psychedelic flair of Alice go together well.  We finished chapter one just as it was time to clean up today.  It was Art Zen.


On a related note, I found a lovely site with all the original Alice illustrations here.  They are ever so slightly disturbing which makes them cool enough for 5th graders to appreciate, I think.

Monday, September 17, 2012

Keep Calm and Don't Be a Squirrel

I have recently decided that I probably have a mild case of ADD.  Perhaps this has developed in my adulthood, but perhaps I've always had it and just never chose to do anything about it.  I do remember getting very easily distracted when I would try to read, and especially if there was music or TV playing somewhere, I couldn't help but zone out and listen to that.  This is probably related to my ability to remember large amounts of song lyrics, while very little useful information is retained.  Musical theatre kid problems?  If I had a dollar for every time I got distracted I would...oh snap, is that CAKE?

*runs away*

See what I mean?  That's me.

In whatever case, I get very easily distracted when I am teaching.  Kids love to raise their hands, stop me, ask innane questions, and then I can't even remember what I was talking about after I remind them that they could have asked me that later.  They love to interrupt me by saying, "OOOOOH!  Did you make that?!?!"  Yes, kid.  I made that.  I'm the art teacher.  Stop being so surprised by my awesomeness.  Then, another kid yells, "Did you make THAT?"  No kid.  That is the Mona Lisa.  Then I try to ignore the spiraling feeling that they don't listen to anything I say.  It's gotten to the point where I hardly ever call on anyone until I'm finished with the instructions, and then I ask for questions.   

I have round stools in my classroom.  They are the bane of my existence.  Not only are they poorly constructed and uncomfortable to sit on, they squeak like crazy whenever a kid moves, and kids inevitably wiggle back and forth on the legs, leaning one way or the other until BAM!!  The stool falls over and the kid is lying on the floor, stunned.  Obviously that is a huge distraction for me.

So I have started trying to impress upon the little angels that they need to help me out with my distraction problem.  I don't call it ADD, but they know what I mean when I say, "I'm very easily distracted."  It occurred to me that in a way, I am very like the dog from the movie Up. 


You remember him, right?  Adorable.  Remember how he would stop in the middle of a thought and stare at a squirrel?  I've stolen that, and started saying to the kids, "Hey, kid.  You're being a squirrel right now."  That, I suppose, is a lot nicer than me yelling, "HEY!  STOP IT WHATEVERYOURNAMEIS!  I'M TEACHIN' HERE!"  Not that I would say that in the first place...ahem.
 
So far they seem to think it's cute, and it's been working.  This success prompted me to make a poster. 
 
 
You can make your own customized poster here.  It's pretty cute.  Although I would have preferred an image of a squirrel at the top, I put the dog.  I probably could have made my own using Word, but this was too easy to pass up.


Wednesday, September 5, 2012

Pencils and Why they Bug Me

Lately I've been really getting annoyed at how long it takes kids to choose and sharpen pencils.  It's about as long as it takes me to pick out something on Amazon.com.  It has to be the PERFECT one, in the right condition, and shipping from as few locations as possible.  Many of them also feel the need to choose erasers, since I purposely rip the ones off the back of my pencils due to latex allergies at our school. 


Erasers are my next biggest annoyance.  I used to buy the cool neon cap erasers, but those seem to somehow exit my classroom very quickly.  Then I tried the chunky colorful ones, and those exited the room even more quickly.  So I bought ugly gray erasers, and chopped them all in half.  Now the kids abuse them, and they look like rotten little teeth.  :(


I'll admit, when I was an elementary lass, many years ago, I used to be very OCD about my pencils, too.  They all had to be sharp all the time.  I never used the erasers on the back, because I wanted them to stay intact.  I would put a cap eraser on all my pencils.  Once they got sharpened too much, I stopped using them because my hand would get cramped.  There were certain pencils I saved in a zipper pouch and never sharpened:  glittery ones, Lisa Frank unicorns, scented ones, pencils from travel destinations, and some given as prizes for good behavior or 100% on a spelling test.  Yes, children, I feel your pencil pain.  However, when I see you for 45 minutes once every six days, you're going to have to get over your pencil issues.


Since I've introduced the sketchbooks, I've been having the kids write down their objectives for a lesson, and a few (less than a paragraph) notes about the topic.  So instead of me just rolling on into my speech about the lesson, and having the kids sit there listening, I have to wait 20 MINUTES for them to sharpen a pencil?  NO.  NO, I SAY!

This may sound like a simple solution, or maybe you think I'm crazy, but I am making the kids USE PENS.  Think about it: no sharpening, no erasers to pick out, no whining in the middle of my speech because theirs broke!  It's a beautiful thing.  Not only that, but while working in their sketchbooks, using a pen teaches them not to erase and worry about every little detail.  They have to try again or just let it go.  And today, the beauty of this theory was tested.  A teacher sent her students to my class with their own pencils, ready to go.

Y'all, it STILL TOOK THEM 15 MINUTES TO GET READY!  GAAAAH!

So, you know what?  I'm phasing out the pencils.  Maybe I'm crazy, but I could also be brilliant.  It's a possibility. 

Wednesday, August 29, 2012

Sketchbook Update

I love using the sketchbooks!  Today I decided to try having them out while I'm introducing a lesson and asking the kiddos to take notes.  EVEN THE SECOND GRADERS DID IT!  First grade did, too, but not to the extent of the older ones, of course, since the littles are still learning to write.  But hey, now I am helping to improve LITERACY!  Woohoo!!

As I was going through my slide show, I wrote on the board a few very simple notes about our topic, and I had them copy down the objectives for the project too.  (In our district, we call objectives "I CAN Statements.")  So for my Keith Haring  project, the I CAN statements were:  I CAN make patterns using lines.  I CAN show MOVEMENT in my art.  I CAN talk about the artist Keith Haring. 

I made sure the kids knew how to "Draw with Good Purpose."  This is derivative of the Quantum Learning Key of Excellence about Speaking with good purpose, i.e. not interrupting, using kind words, staying on topic, etc.  So drawing with good purpose means not wasting paper, using it for practice and kind things.  I really emphasised using ALL the space on a page, even if you had to turn it sideways.  I showed examples of lots of sketchbooks from many artists, including Leonardo DaVinci.  So we had a good long discussion about how to use the sketchbooks.  THEY ARE NOT BOOKS FOR FREE DRAW.  My oh my.

Look what they did!


I'm so proud!


Monday, August 27, 2012

CHOCOLATE PAINT!

Yes.  You read that right.  Paint.  It has chocolate in it.  It smells like chocolate.  It looks like chocolate, and it has a cool texture when it dries.

I am so excited, y'all.  As I walked into the hallway last week, I smelled something delightful and fruity.  I asked my Kindergarten neighbors what the scent was, and they showed me the strawberries they were painting, using strawberry jello and red tempera paint.  They had the texture of strawberries and they smelled divine.  The kids were having such a great time, I decided to experiment for my yummy cupcake lesson....

 
To make the chocolate scented texture paint, I added a little bit of jell-o pudding powder to brown tempera paint.  I stirred it up and saved it in a baby food jar.  It sat all weekend in the jar and hasn't dried up or gotten smelly.  (Except for smelling like delicious pudding!  *drool*)  I would probably recommend using sugar free jell-o to avoid getting little visitors in your room, but I don't know how that would affect the texture.  The white spots on my test paper are vanilla pudding and white tempera.  They didn't smell like vanilla until they dried, so I considered the chocolate more successful.
 
Anyhow, I am planning to do my Cupcake Lesson on Wayne Thiebaud very soon, and I wanted to add another fun element to the paint.  Last year I had puffy paint made with shaving cream which we used for icing.  So I think this year I'll have them make the cupcake bottoms with the jello paint, and add the puffy icing for two different textures. 
 
 
Here is the paint in the jar so you can see the texture when it is wet.  I am thinking later on when we make texture/value collage papers, I will use a little scented paint!  Hooray for JELL-O!
 
UPDATE:  (December 2012)  After trying the chocolate paint method above, I've concluded that since it dries VERY hard, it would work best on thicker paper, or cardstock.  I've since switched to a mixture of shaving cream, elmer's glue, and jello pudding powder for fluffier results.  Also, something about adding the jello to the mixture kept the puffy paint fresh for an extra day.  Previously, the shaving cream/glue puff paint would only last in the ziploc bag for one day.


Wednesday, August 15, 2012

Storage Solutions

This year I am trying something new for storing my students' sketchbooks and portfolios.  I found these mobile drawer units at Wal-Mart for $18 each.  The drawers come all the way out, and they can be taken apart, so I am still playing with how tall I want each unit to be.  I am indulging my OCD and making them all the same color, since there were not enough color options to use my color coding.  My problem is that if I stack them on the floor, I will have to bend up and down all the time to get the folders out.  If I stack them double on the counters, I will have to reach up high and I will inevitably drop entire drawers on my head.  So I have tried to stack them as high as I can stand, and use as little counter space as possible.

This is the kind of math problem that keeps me awake at night.  Luckily, everything pops apart easily.


Do ya like my curtains?  I'm going with blue this year, since it's calming and makes the room seem bigger.  I took a shower curtain rod and hot glued it to the cinder block, and hung fabric shower curtains up!  They are the perfect size for my windows!

Sketchbooks 2.0

I have finally gotten my act together and I've made a sample sketchbook.  This is the type I will be using for Kindergarten and 1st grade.  It's small, and easy to make FOR the kids. 

I just made a plain old little book, with card stock for the cover.  I trimmed the copy paper inside to be 8.5 x 10.5 or thereabouts, just to make sure the cover hung over the edges a little bit.

Our workroom has one of these fascinating devices which I am honestly in love with at the moment.  It's called a saddle stapler.  I'd never heard of it until moments ago.  Apparently you can put the folded book over the arch and staple into the crease without bending the staple!

See it.  Love it.


I think it will be very easy to make a million of these for the littles, and I might even decide to make them for the big kids next year, if all goes well.  Right now the big kids are using their brad-folders with blank paper inside as their sketchbooks.  But I feel like those will be harder to use for drawing, since they won't lay flat.  Ideally, I would like to have all the books spiral bound but I suppose that's dreaming...since I don't have anybody to help me do that, and they would all be huge when we were done.


Even though I love my red Swingline stapler, it isn't really up to this task.

I'll let you know how things go!  My plan is to have all the sketchbooks made by the end of the next class rotation, and have all the kids ready to draw in them ASAP.  I want to start the year with a Zentangle lesson so they will all have some go-to art activity when they finish things or when I have a sub.


Monday, August 13, 2012

Sketchbooks

So every year I try to refine and perfect things I messed up the year before.  Don't we all?  Last year, due to the sheer numbers of kids I had, some of them never actually got the lovely "art journal" packets I made.  New kids came and went, and every time a new kid showed up, I had to run off another packet.  Our copier is in use all the time, and I never seemed to be able to get in there to get that done.  So my solution is this:  Blank pages!  Yes, instead of art journals with tons of....ok let's face it...they were worksheets...My kids will have a sketchbook.  This is where I'll have them do thumbnail sketches, and when they are finished with the day's work they can choose a sketchbook prompt from the board, or from a list I'll print off.  I anticipated confusion, but when I said the word "sketchbook" today for the first time, there were plenty of positive responses from the kiddos. 

Let it be known, I am not a big fan at all of free draw in my class.  The kids tend to waste paper, and leave a mess, and even rush through the project so that they can draw whatever they want.  That's not ok.  They're supposed to be doing their best work all the time,  right?

I usually take the recycled paper from the workroom and let the kids use the blank side for free draw.  This is what
my free draw center looks like pretty much every day.  Tiki Man is angry.

So I just hole punched a pile of white copier paper and had each kid take 10 pages for now, and put them in the brad folders they were supposed to bring to class.  Today I only had time to give one class a sketchbook prompt.  Some of them sat and thought for a long time about it.  I told them it's ok to write in your sketchbook instead of draw.  It's for saving ideas.  So if they are pictures or words, it doesn't matter.  Studies have shown that working consistently in a sketchbook can help improve literacy.  Seriously.  That's what I read.  Somewhere.  I wish I could link you. 

Now I need a nice, organized way to store them.  I had been using colored file boxes, but they are really too small and tore up easily.  I need some rubbermaids, or maybe a shelf system.  If you use sketchbooks with elementary kids, what do you do?  Do you give prompts, or let them just draw and collage freely?  I'd really like to know.  This is something I hope I can be consistently utilizing rather than free draw or busywork.

Have a great start to the year!

Tuesday, February 14, 2012

Broken Projector. Op Art!

So I'm spoiled.  I have a lovely projector in my classroom, a document camera, AND a Promethean board.  So whining about how my projector is on the fritz right now is not really very productive.  I must say though, that in the absence of the projector I've encorporated several new projects I wouldn't have done if I'd been able to move forward with my curriculum the way I'd planned.  Right now, 5th grade is working on Op Art.  I tried this with the same group of kids when they were in 3rd grade and they did fairly well with that version of the project, which was basically an ink blot, with "echo" lines around it, or if you speak Zentangle, we'll call them "auras."

Here's the version from two years ago.  I included Color Field Painting in the inspiration.  Basically we used a blob of watercolor, and a straw to blow the blob into drippy shapes.

I needed a lesson that would review a lot of key terms and concepts, and introduce a new one, which didn't require a lot of demo and slides on my part.  And I noticed as the next class came in, I didn't feel like demonstrating the exact same style of Op art.  So I mixed it up with three different projects, all having simliar objectives: to demonstrate Value, Movement/Rhythm, Pattern, and (illusion of) Form.


Here are the three different examples I ended up with.  So far the kiddos are into it, since it takes far less brain power than the previous block printing project.

Thursday, February 2, 2012

DIY Wet Wipes


Necessity is the mother of invention, as they say.  I use baby wipes for cleaning tables, hands, faces, floor, whatever.  We go through a lot of them in the art room, but I try to use them sparingly.  The "Dirtiest Baby Wipe" contest works well for conserving wipes. 

On the kids' supply list that they get from their regular teachers is a pack of baby wipes that is supposed to come to me for use during the year.  I think I only put it on one grade level's list, because I don't have the storage for that many (over 800) packs of wipes each year.  But I ran out.  I have run out a couple times since August, actually.  But I usually send out an email and ask for anyone's leftovers, and they turn up randomly at my door the next day.  This time, no.  This time I was plumb out of wipes, AND also plumb out of paper towels in the little holders by the sinks.  The maintenance staff is supposed to refill those as I understand, but it doesn't always happen.  In my room that is a BAAAAD thing. 

So I searched Pinterest and found that you can use decent paper towels (the soft, durable kind) to make your own wet wipes.  It worked great!  I should give most of the credit to my fabulous colleague, whom I will refer to here as "Ms. Squash."  She's the one who figured out how to cut and store the wipes in a coffee can.  Here's what to do:

I dug into my emergency reserve of paper towel rolls, and pulled the cardboard tube out of the center.  Then we used my paper cutter to cut the entire roll in half.  This actually didn't work too well, but since I didn't have a serrated knife at school, it was the best I could do.  If you do this for yourself, at least try a box cutter or an X-acto or somethin'. 

Then I took an empty coffee container with a lid and in the bottom, made a slurry of water, liquid soap, and good old Germ-X.  I then put the halved paper towel roll (without the cardboard tube) into the coffee container, closed the lid, and turned it over.  The liquid soaked the paper towels, and when I opened the container, I was able to pull individual wipes out from the center of the roll just like the Clorox kind.  I tried it once with cheaper paper towels, and they kinda fell apart when they got wet.  I've been told that Viva is the best brand for doing this.  But we used Brawny Basic and they work just fine. 

Lastly, I used my grown up scissors to poke a hole in the lid of the coffee container, and cut out an X for the wipes to slide through.

Omigosh you guys, the paper towel roll cut in half is EXACTLY the right size for a regular coffee container.  The ladies in the teacher work room send me those coffee things all the time, and I use them for various things, but this is now my favorite use.

You could experiment with the amount of water to add to the can, but I found I needed a very small amount to make them damp, not wet.  :)

YAY!  This way I could even customize my liquid mix to include some lovely lavender castille soap, or a little bit of lysol or whatever.  Oh the JOY!

Monday, January 30, 2012

Finished Celtic Knots


After trying this with a few classes, I don't know why it never occurred to me to have them draw on colored paper, using the black and white charcoal.  I did that for my second example, (above) and it turned out much better.  But still, they are able to do the project with minimal whining.  I've found it's important to give them only the soft charcoal pencils and not the hard ones, since the hard ones obviously don't make as dark of a mark.


But here are a couple of the first few to be finished.  The later classes have drawn them on construction paper.  I found the construction paper, being more fibrous, I guess, took the charcoal better and added more contrast to the shaded parts.  But the white ones are very nice as well.  I found I really had to get the kids to think SIMPLE!  I coached them through drawing the center of the design, and then let them finish it however they liked.  A lot of them wanted to go nuts with overlapping knotwork, which did not translate well when they tried to transfer it into the other sections.


This one was just simple enough, and she did great with the shading.  So there ya go,  Fourth Graders CAN do Celtic knotwork!  :)

Tuesday, January 24, 2012

Mondrian Mixed Media

I have tried to do Mondrian with my littles before, but so far it has always turned out looking very blah.  This year I was determined to get better results with the kiddos, and so I went with my old philosophy of "keep adding stuff until you like it."

So First Graders are still working on motor skills somewhat.  The objectives for this were to make horizontal and vertical lines with a ruler, to be able to talk about Mondrian, to make artwork using geometric shapes, and to name the primary colors.

First I had the kiddos look at my Mondrian slides, briefly.  He's an artist I really like, but I tend to not elaborate very much about his history.  Simple is simple, right? 

Then I talked them through how to make real horizontal and vertical lines on their 12 x 18 paper.  I had them think about Balance and making some spaces open, while others were more filled in with smaller shapes.  I took a lot of time showing them how to hold the ruler still and draw with their other hand.

Then, that same class period, I had them paint in some of the boxes on their paper.  I again emphasised Balance, and suggested they pick three boxes to make red, three blue, and three yellow, making sure they were spaced out all over.  Some of them still didn't really do that, but it was fixable with the next step.

The following class period, I pulled up "Broadway Boogie Woogie" and we looked at it more closely.  I had the first graders go over all their pencil lines with Sharpie.  Then, I had them use glue sticks to add smaller construction paper squares and rectangles onto their paper.  I told them how they could stack the shapes, put them in empty boxes, or glue them right on top of the places they painted before.  I also had long strips of black paper in the box that they could use to emphasise some of their black lines.  As they glued things on, they had to keep everything horizontal and vertical.  No diagonal placement was allowed!

So we broke some of Mondrian's rules a little, but I am much more pleased with the results this time around:


Having the whole group working in Primary colors made me think how great these would look all hanging together in the hallway.  That is, if I EVER had time to hang all that stuff up!  I have over 800 students...but that's another story!

Friday, January 20, 2012

Frank Lloyd Wright- Inspired "Stained Glass"

I had been envious of the pretty chalk and glue line projects I've seen on other blogs, and it finally dawned on me that I could do that with black construction paper...

Second Graders have the North American Theme, and so I decided to tie this in with Frank Lloyd Wright, his geometric style and his stained glass.  We talked about geometric shapes vs. organic shapes, Balance, and Space.

I gave the kiddos a black piece of construction paper, about 6 x 9.  I told them to write their names on the back and then put their pencils away, because we were gonna draw with GLUE.  I found that it worked better to have them draw directly onto the paper with the glue, rather than try to make a design with the pencils first.  When they drew with the pencils, they made everything too small, and then trying to go over it with the glue was frustrating.  So, they made simple, geometric shapes, and made sure to leave some open space so they could "see" out of the window.

The following class I gave them chalk pastels to color in the spaces around the glue shapes.  I'd planned on giving them paintbrushes with tissue wrapped around the wrong end for blending, since I didn't have any Q-tips at the time.  One kid started using the actual brushy end of the brush to blend the colors, and it worked GREAT!  As long as they washed the brushes out afterwards, I let them use the paintbrushes for blending.  One less thing to buy!

Here's how they turned out.  There wasn't a single one that didn't look gorgeous!


Variety Paintings

I do a lot of abstract art with the littles. They are better at making "lines, shapes, and colors" than they are at making realistic subjects.

So for our painting lesson, we looked at the work of Kandinsky and talked about Variety.  We learned the sign language for Variety, Line, Shape, and Color, and we painted like super artists.  This week we took the paintings and added even more variety by using skinny markers in the white spaces.  I LOVE THE RESULTS:


Tuesday, January 17, 2012

How to Paint with Kindergarten. ALL THE COLORS!


I am an elementary art teacher, and I ain't scared.  I can have my Kindergarteners (usually a class of about 30) paint.  YES, TEMPERA PAINT!  I'm sure you have your favorite way to manage paint in your classroom, but here is the method I've found to work the absolute BEST.

First of all, I love tempera cakes for littles.  For the big kids, not so much.  The little ones though do very well, and set up is minimal.  Firstly, I have seven tables in my classroom.  On each table I place a tray (I bought these from School Specialty, but you could use muffin tins if you prefer.  They're the perfect size.) And in each tray are ONLY one color of tempera cakes.  Each table though, gets a different color.

Next to the paint, I place a large cup with a wide bottom with brushes in it.  NO WATER.  I hate for paintbrushes to soak in water, for many reasons.  But with the littles, they inevitably tip it over, so I just don't give it to them.  :)

Here's how it works.  During my instructions the paint and brushes are on the table, but the tempera cakes are dry.  After my directions, I then squirt water into each of the paint trays using a little squeeze bottle.  Once a table has wet paint, I let them get up to get their art shirts.  I usually don't give them water until they show me where they've written their names on their paper.  This accountability is good for them, and they've begun to police each other. 


After they are shirted up, they can use the brushes on their table to "dab, dab, dab" in the wet paint, and "brush, brush brush" on their paper.  My colleage uses the phrase "tickle the paint" and I like that as well.  After they are done with the color at their own table, here's the trick.  They put that paintbrush BACK IN THE CUP.  Then they pick up their paper and MOVE TO ANOTHER TABLE!  I have children wandering freely around my room, and the paint doesn't get mixed up because the brushes live next to the paint tray, and stay with their own color.

I wash the brushes at the end of class, because I still don't really trust Kinders to do that.  Maybe one day.  Dream a little dream.

Clean up is easy too.  I give a couple kids the job of returning the brushes and the paint trays to me.  (More on how I assign jobs later.)  And then I go around the room and when a kid is in their own seat, I give them a baby wipe.  We then have a "dirtiest baby wipe contest."  This keeps the kiddos from throwing away their wipe when it still has wiping power.  I can also tell who is actively looking for paint to clean up.  And they LOVE this.  Whoever has the dirtiest baby wipe usually gets a little perk, like an extra big behavior buck or a sticker or whatever.