Showing posts with label 4th grade. Show all posts

Tuesday, December 11, 2012

European Folk & Fairy Tales

Yay!  It's been a while, but I'm still here! 

For this project, I wanted something a little quicker so they could finish before the holidays.  I decided to have 4th grade do an illustration-inspired project with European folklore.  Mainly I was inspired by Wil Huygen's book Gnomes.  This book was one I remember checking out from the library over and over as a kid.  The illustrations are gorgeous, and much of the text is hand-written, as if this was a sketchbook that the author took with him as he observed the actual gnomes.  I do let the kids look at my copy, even though there are a couple of nekkid gnomes in there.  As always, I employ my "If you can't handle it, turn the page" policy when it comes to nudes in Art.  As my first boss (a NUN!) told me, "As long as it isn't of a sinful nature, the children should be allowed to see it."  After all, how many nude Baby Jesus-es are there out there in the Art world?  Huh??  I digress.

 I asked them to choose a fairy tale character or creature, or something from a European legend, such as a leprechaun, a dragon, or the Loch Ness Monster, then create a small illustration.  Using EMPHASIS (sorry, I'm so used to typing the vocab words in all caps) they will add the name of their creature in decorative letters.  For the background, they will create a texture using text.  Get it?  TEXT-ure.  Har, har.  I'm having them research their creature and write some info to texturize the background.  My county has this nifty technology initiative, so it's ok for kids to bring wi-fi enabled devices, such as iPods, and Kindles to school.  They will use those in my class for their research.  (But I also cleaned the library out of resource books so they could get some ideas, and so they could share the books and the tech.)

So far they are pretty excited, and I like that I'm integrating the technology.  (Go me!)


Here are my finished examples.  I can't decide which will really work best for my intention of this being a quick project.  I may even cut the paper down to quarter pages, as well.  The tea-dye process takes an extra day, but perhaps they can do that on day 2, when they will mostly still be sketching and taking notes for their research.


Monday, August 13, 2012

Sketchbooks

So every year I try to refine and perfect things I messed up the year before.  Don't we all?  Last year, due to the sheer numbers of kids I had, some of them never actually got the lovely "art journal" packets I made.  New kids came and went, and every time a new kid showed up, I had to run off another packet.  Our copier is in use all the time, and I never seemed to be able to get in there to get that done.  So my solution is this:  Blank pages!  Yes, instead of art journals with tons of....ok let's face it...they were worksheets...My kids will have a sketchbook.  This is where I'll have them do thumbnail sketches, and when they are finished with the day's work they can choose a sketchbook prompt from the board, or from a list I'll print off.  I anticipated confusion, but when I said the word "sketchbook" today for the first time, there were plenty of positive responses from the kiddos. 

Let it be known, I am not a big fan at all of free draw in my class.  The kids tend to waste paper, and leave a mess, and even rush through the project so that they can draw whatever they want.  That's not ok.  They're supposed to be doing their best work all the time,  right?

I usually take the recycled paper from the workroom and let the kids use the blank side for free draw.  This is what
my free draw center looks like pretty much every day.  Tiki Man is angry.

So I just hole punched a pile of white copier paper and had each kid take 10 pages for now, and put them in the brad folders they were supposed to bring to class.  Today I only had time to give one class a sketchbook prompt.  Some of them sat and thought for a long time about it.  I told them it's ok to write in your sketchbook instead of draw.  It's for saving ideas.  So if they are pictures or words, it doesn't matter.  Studies have shown that working consistently in a sketchbook can help improve literacy.  Seriously.  That's what I read.  Somewhere.  I wish I could link you. 

Now I need a nice, organized way to store them.  I had been using colored file boxes, but they are really too small and tore up easily.  I need some rubbermaids, or maybe a shelf system.  If you use sketchbooks with elementary kids, what do you do?  Do you give prompts, or let them just draw and collage freely?  I'd really like to know.  This is something I hope I can be consistently utilizing rather than free draw or busywork.

Have a great start to the year!

Monday, January 30, 2012

Finished Celtic Knots


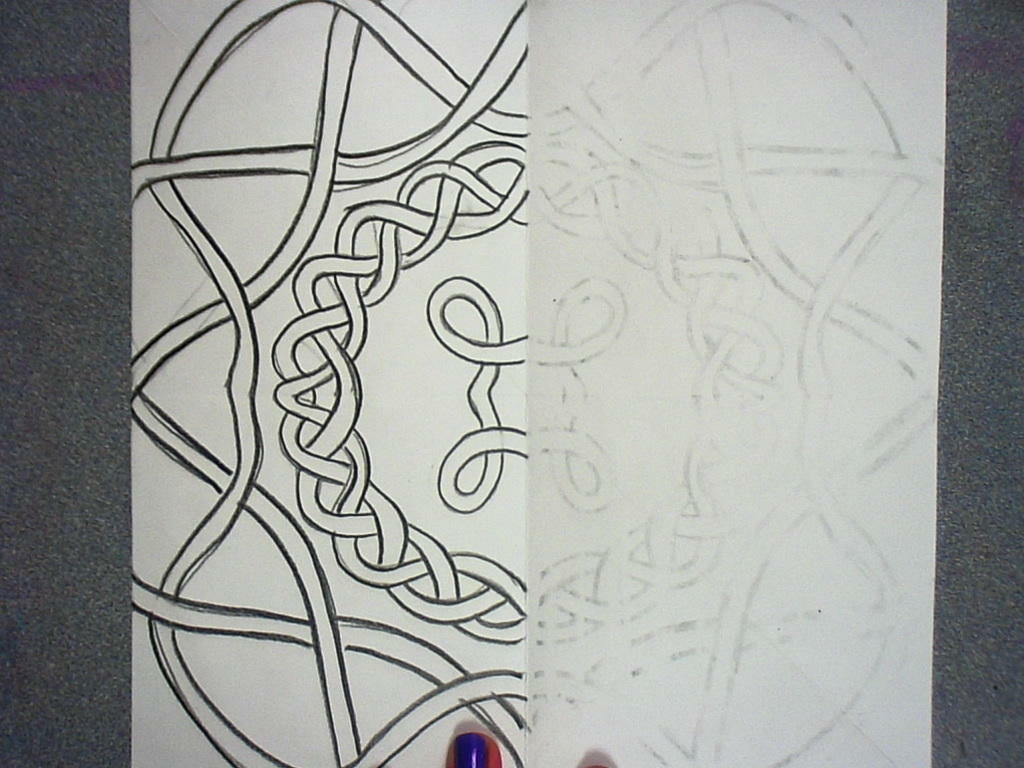
After trying this with a few classes, I don't know why it never occurred to me to have them draw on colored paper, using the black and white charcoal.  I did that for my second example, (above) and it turned out much better.  But still, they are able to do the project with minimal whining.  I've found it's important to give them only the soft charcoal pencils and not the hard ones, since the hard ones obviously don't make as dark of a mark.


But here are a couple of the first few to be finished.  The later classes have drawn them on construction paper.  I found the construction paper, being more fibrous, I guess, took the charcoal better and added more contrast to the shaded parts.  But the white ones are very nice as well.  I found I really had to get the kids to think SIMPLE!  I coached them through drawing the center of the design, and then let them finish it however they liked.  A lot of them wanted to go nuts with overlapping knotwork, which did not translate well when they tried to transfer it into the other sections.


This one was just simple enough, and she did great with the shading.  So there ya go,  Fourth Graders CAN do Celtic knotwork!  :)

Tuesday, December 13, 2011

Celtic Knot Unit

Today I was again shocked at how well my kiddos were concentrating as we drew Celtic Knots.  This must be one of those magic left brain drawings that lights up the whole kid's mind.  :)  Here are the steps for drawing another Celtic Knot unit.  Yes.  MY FOURTH GRADERS CAN DO THIS!!


Monday, December 12, 2011

Celtic Knots and Radial Balance

I wanted to spice up my Celtic Knot project that I've done several years in a row, because so far it just hasn't met my expectations.  Previously, I'd had the kiddos use their initials to make illuminated letters with Celtic imagery (which I'd photocopied from my Dover books and passed out in resource folders).  Most students just didn't really puzzle out how to draw the overlapping knots.  So I thought I'd make it easier by having them draw the knots with a Zentangle pattern.  Here are the steps for the pattern:


Original link here:  Tangle Patterns


So I showed them that step-by-step on the Elmo.  I expected a train wreck.  I told them this was an experiment, and I was going to see how they did before we even worried about turning this into a project or anything.  I expected tears, and crumpled papers flying across the room, hitting me in the head.  But, y'all....They did it!  They got the pattern in one or two tries.  Even the more challenged kids picked it up and were very satisfied to see that it worked for them!

Then I started showing them my work in progress.  I told them I was going to have them draw 1/4 of a Celtic knot, and "cheat" to make the pattern transfer onto the other parts of the paper.  I haven't tried this with the kiddos yet, so I'll keep you updated on how that goes.  This would work even better if you are willing to let the kiddos use charcoal pencils to outline their knots as they are transferring.

But here's what I did for my example:

 Fold the square paper in fourths and draw design in one corner.  Trace over it hard with an ebony pencil or other soft lead pencil.


 Fold and press with your hands, or a wooden spoon to transfer the pencil lines onto the second quarter of the paper.


 Open and you should see a very faint reverse image of the knot you drew.  Trace over it dark with the soft pencil. 


 Fold and transder the first half onto the second half.  (Good way to review factions, too!)


 Trace over the pencil lines darker. 


Connect the lines where they may be slightly mismatched, and begin coloring however you wish.

I think I'll make another fancier one as I go along, but I think the above example works well as an illustration.  Our state's standardized test has evidently got symmetry on it, and the kids aren't scoring so well with that.  In that case, I can actually help!  I've been stressing symmetry with all the grade levels this year.

Tuesday, October 11, 2011

Yoshimi Battle, Warhol Portraits, Oaxaca Animals, Keith Haring

Alright, the kiddos are finishing things now, and I am so excited about how this first round of big projects are turning out!  I had a deadline for my upcoming fundraiser, and the work all has to be finished by Wednesday of next week...this fundraiser is a blog entry in itself...more later.

5th Grade:
Yoshimi has battled the Pink Robots and her "ninja skillz" have paid off!  Objectives for this project included demonstrating knowledge of various types of balance, experimenting with lettering, figure proportions, and interpreting inspiration in a unique way.  Here are some of the finished works:


4th Grade:  I can't post a photo of the examples from the Warhol project here, since they include actual photos of the students.  But I'll do my best to describe what they did.  I took a photo of each kid standing in front of a white background.   Then I uploaded the pictures and bumped up the contrast and converted them all to black and white.  This project was all about CONTRAST!  I printed the photos out, two of the same picture on each page, and gave them to the kids.  They chose complementary colors from my treasure trove of Mr. Sketch markers.  (I recently acquired the 18 color packs which have tints of many of the colors.!  :D ) 
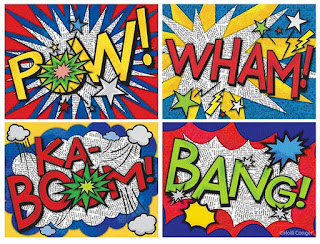
 They colored over their pictures, one in each complementary color.  Then they cut out their faces and bodies from the background, and glued them to another paper, which was already colored in the same complementary pair.  Finally, using darker values of the same two colors, they added Pop Art style lettering, and Ben Day Dots to the backgrounds.  So this was really more of a Lichtenstein/Warhol inspiration than just Warhol alone.  Anyhow they turned out pretty neat, and for a quick marker project, I was happy!  Lesson objectives included: analyzing color and contrast by choosing complements, and identifying and organizing colors by value. I figure you could also do this in primary colors, and teach a little about color mixing and Value...

3rd Grade:  Inspired by the Oaxaca Folk Art carvings of animals, we set out to compare organic and geometric shapes, and create patterns using shapes.    I had the kids find an image of an animal they liked, and draw it large on a white piece of paper.  Then, using thin-tipped markers (Mr. Sketch, of course!) they created patterns using EITHER organic OR geometric shapes.  I made sure I had them choose only one or the other, and stick to that theme, so that I could tell they could compare the shapes.  For this project I deliberately asked them not to draw any kind of background.  I think they are much more interesting without a fake "habitat" for the animals.


I've been impressed with this grade level so far.  I have one student who is so dedicated to finishing this project that she has come in EVERY DAY during recess the past week or so to work on it.  And we are having gorgeous weather.  I'm not talking about rainy days here.  This is the same group of kids I did Chihuly with last year, and they are just a super-creative group, with very sweet personalities and a lot of good character. 

2nd Grade:  The Keith Haring-Inspired line designs with movement are beautiful as I knew they would be.  Kids love Sharpies.  Heck, I LOVE SHARPIES.  When I told the kids we were going to have a fundraiser their response was, "So we can buy MORE SHARPIES!!?!?!?"  Yeah, baby.  So I posted the lesson for this Last Year, in September.  But this year I pushed the movement aspect of it more, and the kids seemed to understand the amount of lines I was asking for.   Objectives included: Creating pattern and movement using line, and being able to talk about Keith Haring.


Wednesday, October 5, 2011

Monochromatic Collages

 So this is a project from ages ago, but I was recently organizing my iPhoto, and it appeared.  I was very happy with the way they look displayed.  Ah the good old days when I actually had time to hang up artwork in the halls!  Ha! 
I showed slides of Mark Rothko (not one of my favorite artists, but the kids really responded well to the idea of color invoking mood.)  After a lesson on value, tints, shades, and all that, the kids chose one piece of construction paper.  This would be their HUE.  

Then they simply cut things from magazines that were in different values of that same hue.  Finally I had them cut letters out (ransom note style) and add them to their collage, making a sentence that pertained somehow to the mood of their artwork.  These turned out even better the next year when I ran out of construction paper, and instead gave the kids a half sheet of regular drawing paper and instructed them to color it entirely one hue, using the MR. SKETCH scented markers.  This not only made the kids ecstatic, but it also filled my classroom with a lovely fruity aroma.  I am a believer in aromatherapy, just as a side note.  And it may sound hokey but I really think scent has an effect on mood as well.  This was something I didn't think to point out to the kiddos at the time, but it would tie in well with Rothko.

After they all finished gluing, I had them coat their collages with watered-down elmer's glue.  The year that we started with white drawing paper and markers, the final glue coat liquified the marker a little bit, resulting in an all over subtle color wash.  Neither I nor the kids were expecting this, and they were overjoyed.  They were tinting their collages themselves.  What a nice surprise!  This also made the work feel more handmade, as the construction paper backgrounds tended to look a little flat.