Friday, March 28, 2014

Faux Batiks with First Grade, Cleanline Resist and Lumi Inkodye

I've had some interesting results with my faux batik project.  We began by studying the batiks of Africa, which is our theme continent for this grade level.  I then gave the kids a piece of muslin fabric.  By the way, if you ever have to cut 150 or so pieces of fabric for some reason, remember it is WAY easier to tear it than to cut it.

The kids traced the outline of their fabric in their sketchbook.  Then, using that as a guide for sizing, they made a very simple drawing of an African animal, and perhaps a little decorative border.  In hindsight, I could have skipped this step, because they definitely made their drawings more detailed than they could ever recreate with the glue.  But it helped them to visualize their idea I suppose.

The fabric was see-through, so they were able to place it on top of their pencil drawing and "trace" it with the glue.  Drawing with glue is tricky, and that's why the images have to be super simple.  You may get better detail if you try using gel glue instead of white glue.  But I have that lovely crayola white glue, and I tend to reach for that most often.

After letting the glue drawings on the fabric dry, we painted over them with tempera. We used one color to help alleviate my logistical issues, but you could use as many colors as you want!

Then, the next week, when the paint was dry, I washed them in the sink with warm water.  I did this for each kid individually, so they could watch the paint come off the glue and stay on the fabric.  I didn't try to remove the glue from the fabric completely, because it would have just taken far too long.  I did that for my example, and I had to wash so much that the color faded too much for my taste.  But depending on how your operation is set up, it may be best just to throw all the batiks in your washing machine without detergent.  The tempera will stain the fabric, and the glue should be completely removed.  I haven't tried that.  I wasn't going to put 150 of them in my washing machine at home for obvious reasons.  :)


I removed the glue from the fabric completely.  But my piece of fabric was about twice the size of the ones I gave the kids.  I tried to do a little gradient with the black and the blue, but it didn't turn out very evenly.  It has sort of a tie-dye look, though.


And here's a kid example.  The color is much brighter, because they dried for a week before we washed them; plenty of time for a nice stain to set into the fabric.  And you'l notice that the white lines are a bit shiny, because the glue is still there.  The kids were happy either way, and this kept the color nice, so we went with this method.

Overall, I'm really happy with these results.  I've been wanting to do a faux batik lesson with kids for years, but I never quite found my groove with it.  I've tried this similar technique on paper before with mixed results, and I've tried the chalk and glue method too.  Here's a link to the Frank Lloyd Wright project I did a few years back.  

It is also noteworthy that if you are doing this with older kids or for yourself, you might want to try Cleanline Resist instead of glue.  It's designed more for batik.


I used a brush to apply the resist to fabric, testing how much detail I would get, and what difference the thickness of the applied resist would make.  You could then use the tempera method described above, or dye of some kind.  You might want to try the Inkodye.  It's a light sensitive dye which can be used for anything from batik to t-shirts, to faux cyanotypes.  I added the dye over my resist, laid it out in the sun and then washed in the sink.  Here's the result:


Because I'm a photography nerd as well, I am gonna have to try this with film negatives!  The instructions make it look super easy.  Now I just have to wait for the SUN TO COME OUT!  :)


Let me know about your experiments with batik!

Thursday, March 27, 2014

Trial and Error

So I've been adapting most of my lessons to the mobile art program pretty well.  But there are definitely some things that have to be changed completely.  Anything that I would normally put on a drying rack now has to go out in the hallway against the wall to dry.  The littles are used to doing this, since they make a lot of projects in their academic curriculum that need drying.  But the big kids?  It was weird to them, and so part of me just wants to nix all that with the big kids.  Their work got stepped on a bit, since they are more rowdy and have bigger feet, I guess?

I was trying out a faux batik lesson with first grade, and the process was to "draw" on muslin fabric with white glue, then let it dry.  Next day, paint over the entire piece of fabric with bold colored tempera paint.  Since I'm on a cart, I gave everyone blue paint.  I couldn't deal with multiple colors of tempera in a room with barely any space to walk between tables, and ONE sink.

The other teachers have been very receptive and accommodating for the most part.  My school is awesome, and my colleagues are the best.  Seriously.  One teacher said I could just leave the wet projects at the kids' seats, since they are my last class of the day and that way, each kid would know which one was theirs without having to mess with writing names on fabric.  I hope I didn't stain her tables blue with paint.  

I have assigned helper kids to collect work at the end of the day once it's dried, and put it back in their portfolio box, but I really don't know if that's happening or not.

The hardest thing for me is when I've made my example, and it worked fine for me, but then when I get in the room, something malfunctions and I have to switch gears on the spot.  I can't leave the room, and I can't send a kid to fetch something, since my stuff is all spread out in various places and I don't even know where everything is offhand.  Most often, I run out of paper, or there's a new kid in class who doesn't have a sketchbook yet, and I have no way to make him one right there.

Another thing I'm struggling with is figuring out a way to have "I CAN" statements posted for my lessons.  I can put them in the powerpoint when I introduce a project, and I can reiterate them while I'm teaching, but the only other thing I can think of is having the kids copy them in their sketchbooks.  That takes a lot of time though, and when I'm already losing minutes setting up, traveling to the classes, and cleaning up, I'm not sure I'm willing to take 20 minutes for a whole class to copy a bunch of objectives.  I could also have them posted on a white board that is attached to my main cart somehow, but it would have to be HUGE to fit everything.  Maybe a flipchart or something?  But again, more stuff to take with me everywhere...

I also get a little frustrated when kids explain to me, "Oh, everybody will be quiet if you just ring the bell," or whatever their classroom "thing" is.  I cannot remember 35 different things for 35 different classrooms. Oi vey.

Also, if I take my laptop with me to the classrooms, so that I can access all my files faster, I inevitably have to reboot entirely so that I can connect to the network in that room.  But that's just a technology glitch. 

So every day is different.  I keep a binder with me that has my lesson plans, class lists, and schedule.  And on each grade level cart, I put the project example.  Yes, I trust the kids not to touch it when it's out in their hallway.  Maybe I shouldn't, but so far, so good!  Ha!  Sometimes I can't even get the cart into the room.  There are so many desks and obstacles in each room and the layouts are completely different, sometimes from week to week!  Our teachers, being so fabulous, like to change up their seating arrangements frequently, which is good for the kiddos but not for me.

I hope that by sharing my experience I can help somebody out who's going through this transition!  I would love to hear about your own situations, too.  Maybe we can put our heads together to solve some of these challenges!


Tuesday, March 25, 2014

Here Comes the Art Mobile!

Hey there.  Sorry I haven't made a post in like - forever!  Been kinda busy.  This January our school's overcrowding got out of control and I have been (temporarily - probably) placed on a cart.  My classroom is now full of kindergarteners.

I have learned a lot so far about what works and what doesn't.
(Pictured:  Unit 00.  This is the cart which I take to every room, sometimes I park it outside the class, or inside, depending on how much space there is in the room.  I didn't clean it up or organize it for the picture.  I wanted to be real with you guys.  It's got my water bottle, project examples, my time timer, drawing books for sketchbook time, glue sticks, markers, scissors, and a lot of nasty pencil shavings which I can't seem to control no matter what I do.)


The first thing I asked for was to have a separate cart for each grade level, and another main cart with basic supplies everybody can share, as well as my planning stuff.  That works pretty well, except when I fail to think about the fact that I need that box of pastels for second grade in the afternoon and fifth grade has it in the morning and I have zero minutes in between classes to go and get it.

(Pictured:  Art Mobiles on their hallway, my paper storage drawers, and the blue class portfolio bins)


Thus, I employ children.  That's right.  Child labor!  No.  Just kidding.  But I do give a lot of "helper" jobs to each class.  I have four helpers whose job it is to push into and out of the rooms, and on to their next destination.  Sometimes they get to push the button on the elevator.  This is a big deal.  Then in addition to that, I have two or three helpers to get the class portfolio box, which I keep on the hallway as well.

So all that's going ok.  I was disappointed that I couldn't do clay with the kiddos this year, but fourth grade has made some cool paper sculptures of Classical columns, all working in their groups at their own desks in their fourth grade classroom.

So other than all that, it's going.  If you are teaching from a cart, please share with me what you've learned so far!  Hopefully by the time I get used to it, I will be in a classroom again, but still!  :)

Wednesday, September 4, 2013

Light Painting

Recently I asked my friends to do me a huge favor and light some sparklers in the front yard.  This was a huge favor because it was the 4th of July and it was pouring rain all day.  They were so mad at me, but then I gave them cake so it was all good.  Here are a couple of the shots I got:


So then I thought I should try this with my students.  Without fire, of course.  We set up my camera in my closet at school, so it would be plenty dark in there, and I gave them a couple of flash lights.  We discussed contour lines, and I showed images of Picasso's light paintings.  So far they are coming out extraordinarily cool.  I can't post them since they mostly have kids in them, but here is one of mine: 


Neat!  I'm using a little LED flashlight.  Laser pointers work, too, but you have to go very slowly drawing the lines, since red light travels more slowly, apparently.  The best results I've gotten were with kids tracing each others' silhouettes, and adding interesting imaginary details.  I've seen mermaids, fairies, angels, wizards, etc.  My camera shutter speed is set on BULB, and I have a remote control shutter with a lock on it, so I can click it and it will hold itself down as long as I want it to.  My F-stop is 25, the smallest it could be with my lens, and the film speed is 100.  So in an almost completely dark room, I got no ambient light in the pictures at all.

There's my Deathly Hallows.
As long as you have a camera with adjustable shutter speed and a tripod, you can do this too!

Monday, February 11, 2013

Swap-Bot Swap Invitation

Second Grade Swap!

I'm an Art Teacher in Tennessee. I've got a whole grade level of second graders, about 150 or so kids. They are working on "mini" artist's trading cards right now. That's a size of card which I invented when we started running low on cards. I cut them in half, measuring 2.5 inches by 1 3/4 inches. My students are all making zentangles, but I'm not picky about how the ATCs are decorated. It would be great if they are all that mini size, but if that is not do-able for you, let me know.


I'm really looking for ONE other TEACHER to swap about 150 cards with. If you are a teacher and you'd like to have your class or classes participate in this swap, we can work out the details.

Here's a link to the swap if you're interested!  http://www.swap-bot.com/swap/show/140282

Tuesday, January 29, 2013

ATCs for Art Criticism


Sometimes the kids figure stuff out on their own, and that's a beautiful thing.  We had made Artists' Trading cards, using Elements & Principles vocabulary.  Each kid in 1st and 2nd grade made two cards, and had a buddy class to swap with.  One card they kept, and the other was traded.  When they received the cards from their buddy class, a process which I kept random, some of the kids had cards that looked fabulous.  Others were not so lucky.  But in any event, I split the assignment so the classes at the beginning of the week had the word "Line" and the end of the week classes did "value."  I wanted to take the opportunity to use the cards made by the buddy class as a way to teach the other words, and some of the students began commenting on their buddy class' craftsmanship.  "My buddy REALLY took their time! I can tell!"  "Mine probably could have colored this better.  But I like the shapes."  They were being art critics!  So, picking up on this, I started asking leading questions.  The best part was, nobody used names during the discussion, so nobody had their feelings hurt, but they could still look at the work and tell something they liked, and something that could be improved. 

A lot of the fun of doing ATCs this way was getting a surprise from another kid their age.  Most of them were really happy with what their buddies made.  There were a few classes that had different numbers of kids, so when I was introducing the lesson, I saved all my examples I made and let the kids who didn't get a buddy card choose one of mine.  Of course, mine were fancy, so they didn't feel jipped.  ;)

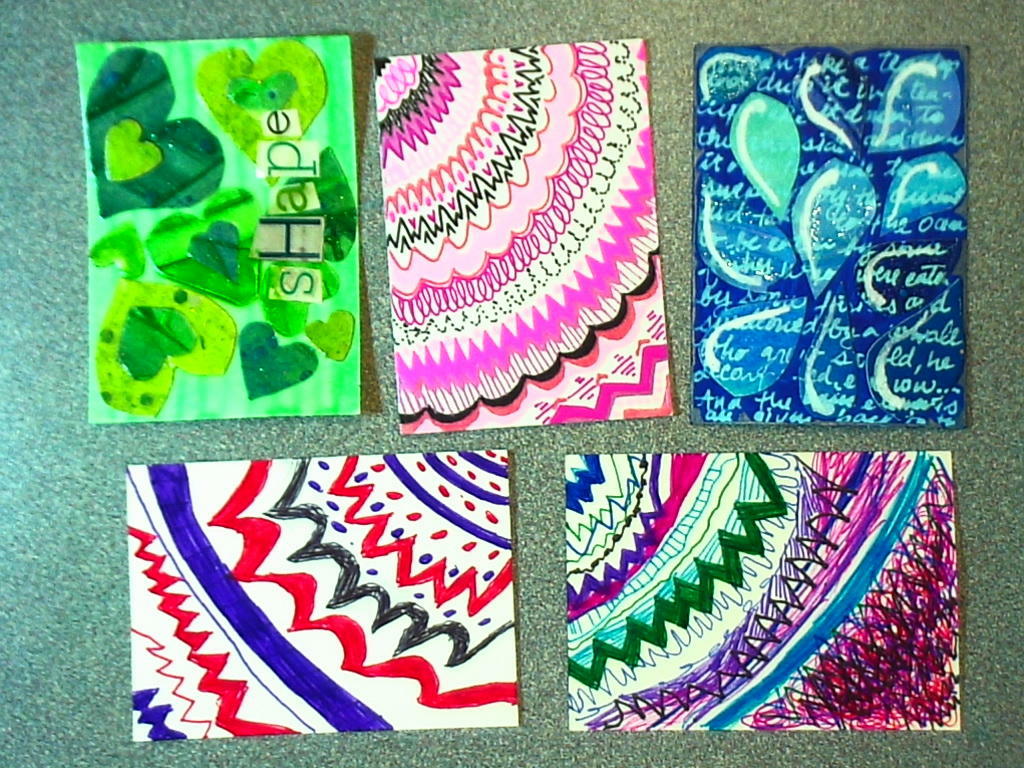
Teacher examples on top, kid examples below.